Monday, June 2, 2008

Universal Grinding Fixture

Awhile back Mcgyver posted an excellent writeup of his build of a Universal Grinding Fixture on the HSM forum:

I wanted a universal fixture for the T&C grinder, capable of holding drill bits and lathe tool bits so that I could easily to facetted drill sharpening, acme or V thread bits etc. I had fun taking pics through the build and thought you guys might enjoy them

The assembly was fabricated using my stick welder


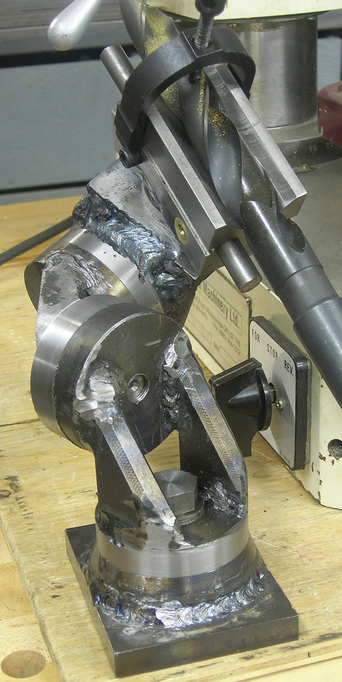
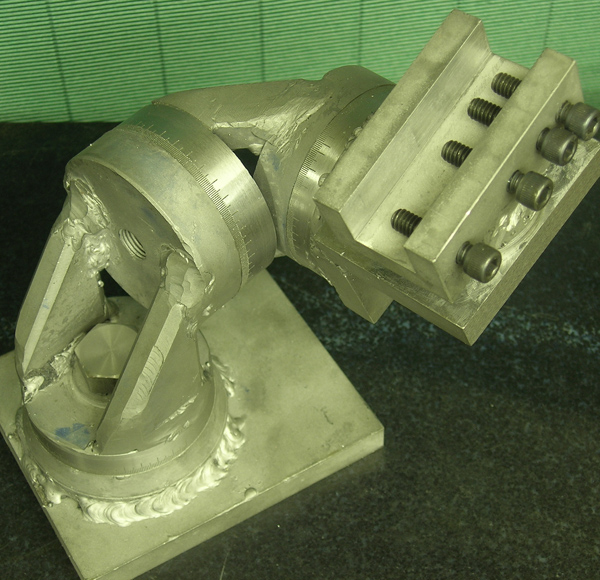
Here's an overview of the unit after welding


I sent everything out to be normalized and had the drill V-block case hardened at the same time. Well worth the $30 to know its going to be reasonably stable


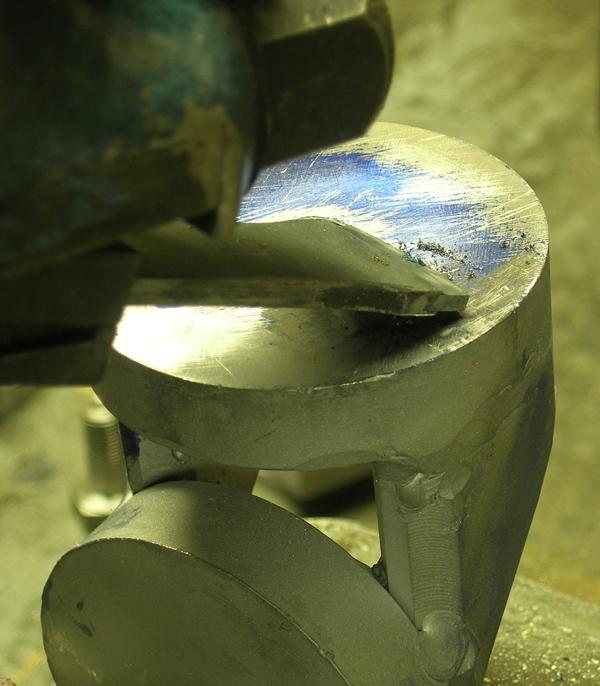
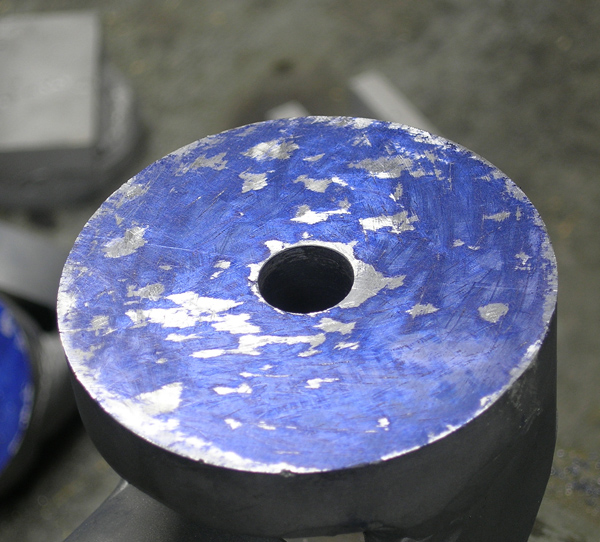
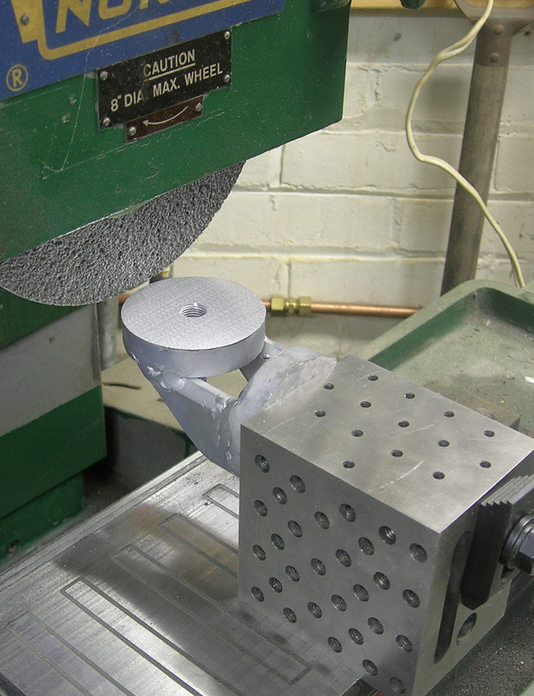
For accurate work, you need a reference surface. I decided to scrap in one side of the elbows so there would be no distortion from clamping. Started with the power scraper


and finished with a hand scraper. Almost complete blue-out - good enough for the girls I know!


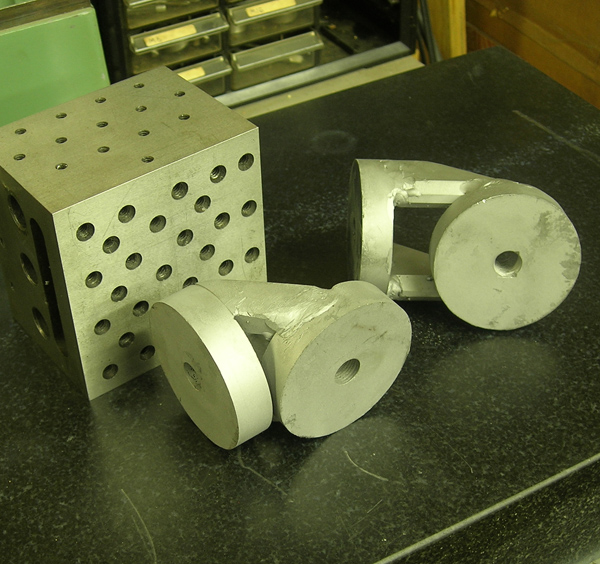
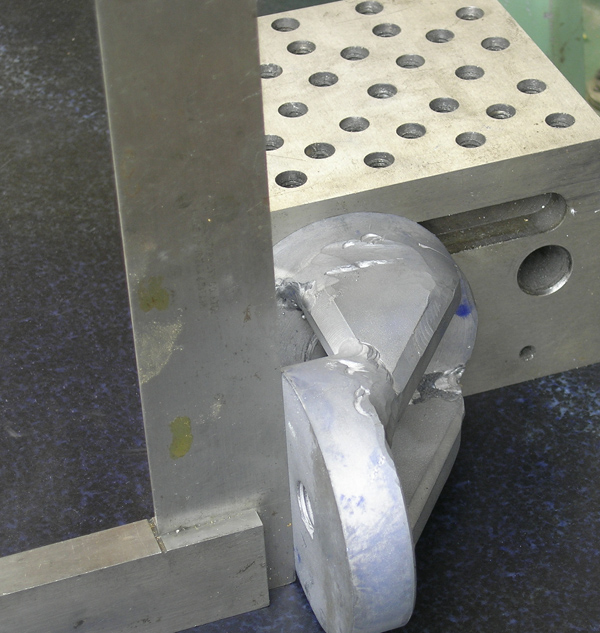
I bolted each elbow to a tool makers block (made by yours truly, hardened and ground square to 1/10 thou all over and done as a matched pair).


The elbows are now all squared up.


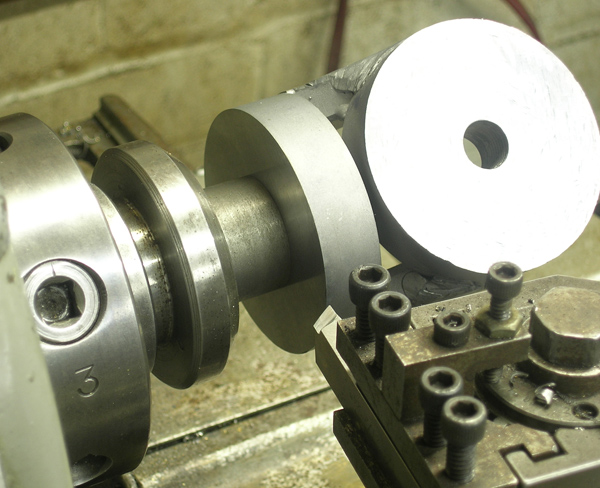
I then made an arbor for the lathe to clean up the circumference.


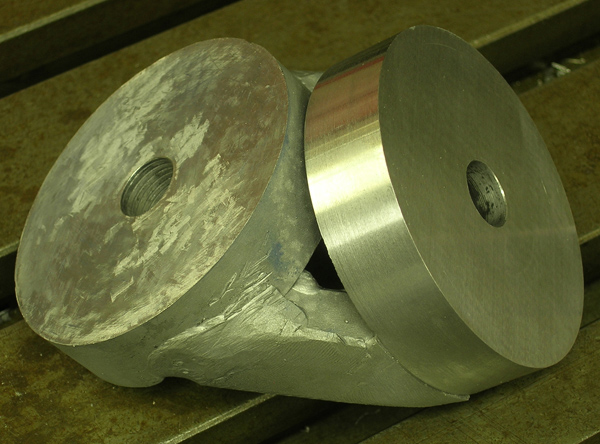
Here's an elbow, square and ready for divisions


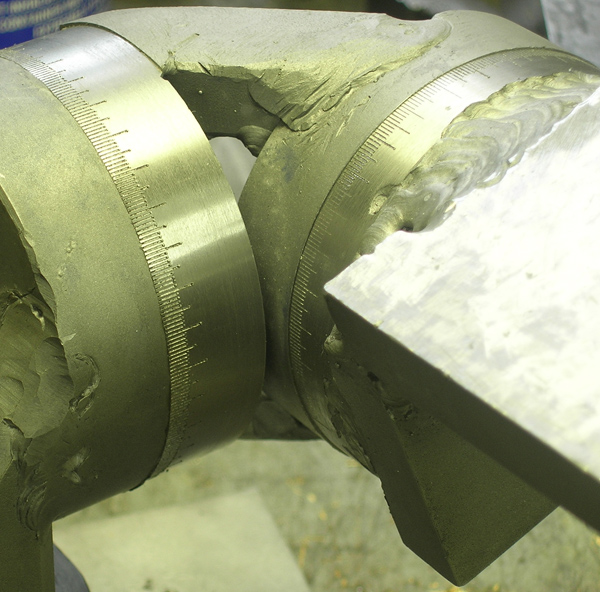
I graduated each axis in degrees - TEDIUM! Gotta get the 4 axis cnc built!


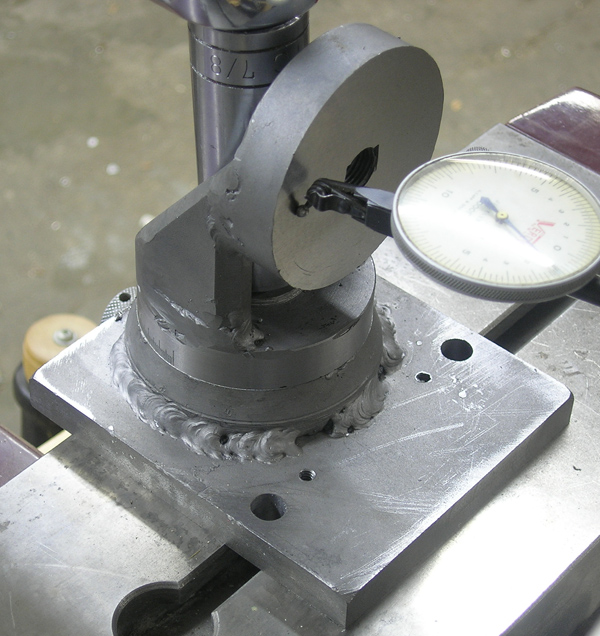
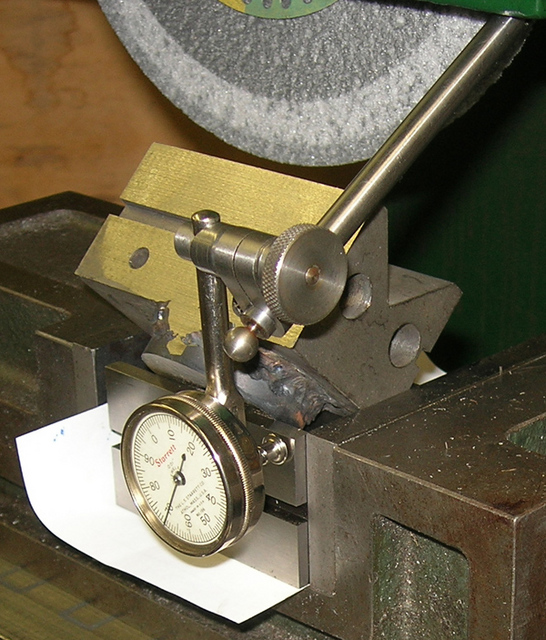
With one disk graduated, the other needs a witness mark. Here I'm using an indicator to get the disk's face parallel to the machine's axis before make a witness mark on the base


Graduating all done!


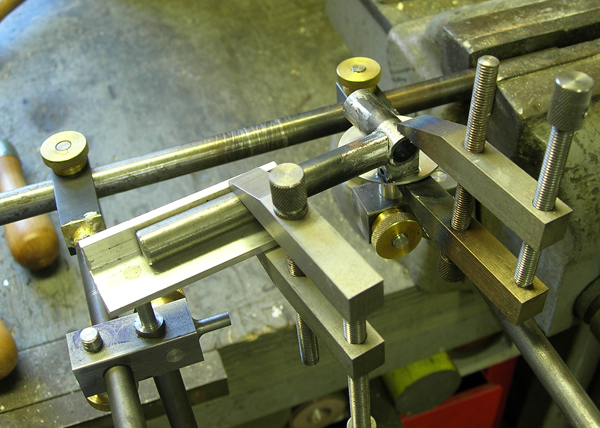
Here's progress to date, I mainly included this shot to show the tool bit holder attachment.


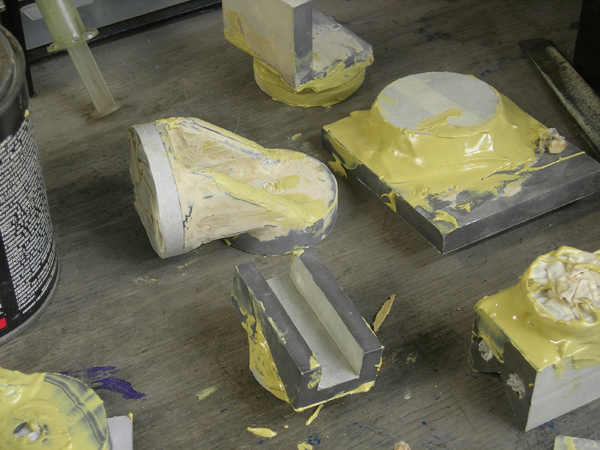
Now things get messy. I used auto body filler, spot putty and a couple of coats of cellulose primer with sanding in between


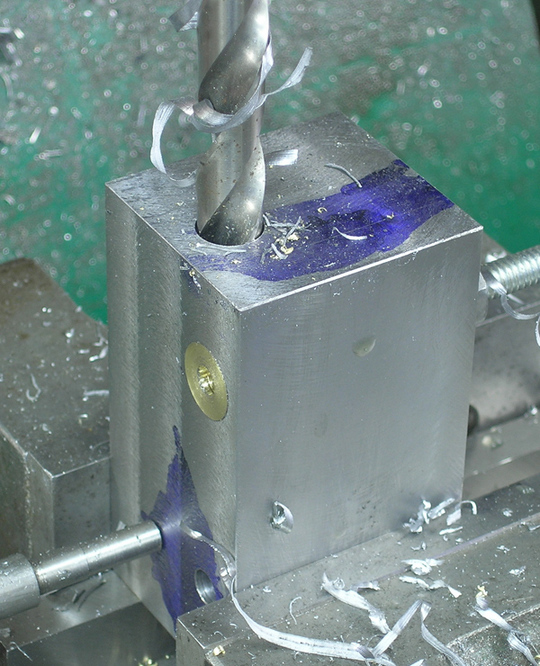
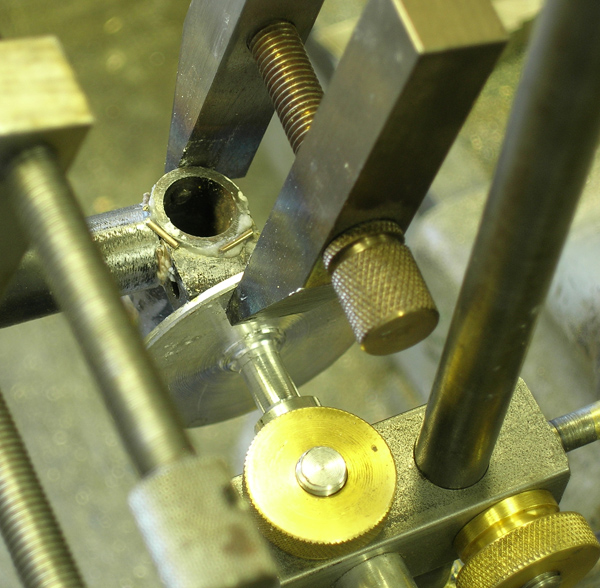
This is chronologically a bit out of order - machining on the V-block was done prior to case hardening. Here am drilling the two longitudinal holes, one for the tooth rest gizmo and the other for rest at the end of the drill. The two bars the make up these mechanisms are held via cotters - you can see the brass cotter the intersects the hole and the 1/4" ready rod holding it in place


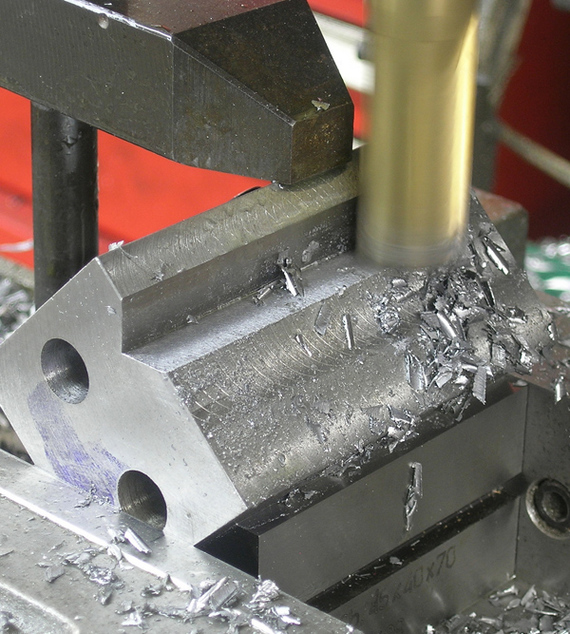
Here the V is being cut.


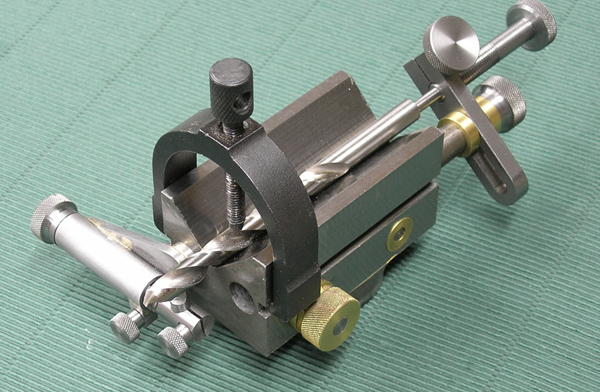
Here's the drill stop - an adjustable gizmo that the end of the drill rests against. There are a couple of different attachments for this - ie a long thin adjusting screw for very small dia drills and different lengths of the long rod. It will hold drills from 1/16 to 1" or more


I made this "third hand" rig and posted pics of it here awhile ago, and a few wanted to see it in use - here you go. It's a real time saver, otherwise to do this job properly you'd be pinning or such the pieces together. The work piece is the {rest missing}


I get the best silver solder results by placing small pieces of solder in the flux and then just warming everything up


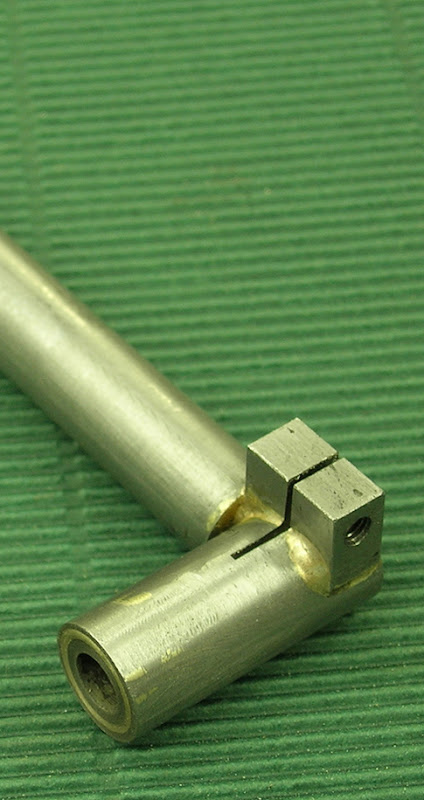
Here's the tooth rest body after pickling and slitting


The tooth rest is almost done. There will be a micrometer feed on the end, I still have to make the screw and end piece. The idea is that between its built in adjustments and the convenience of the cotter holding it in the V block, its quickly adjustable to any position and then the micrometer adjustment can bring the tooth rest do the final position


The V block is being set up for grinding. It was ground all over after case hardening and an oil quench.


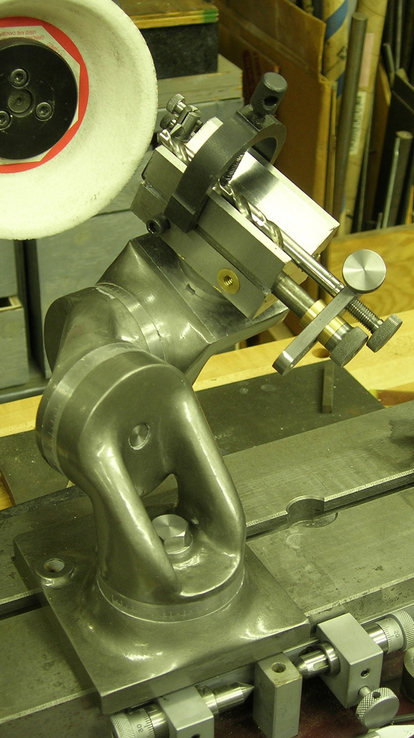
Here's the completed unit. I used the Tremclad hammer finish paint - I don't think I'd recommend it and probably won't use it again but don't have energy right now to refinish.


More Comments:

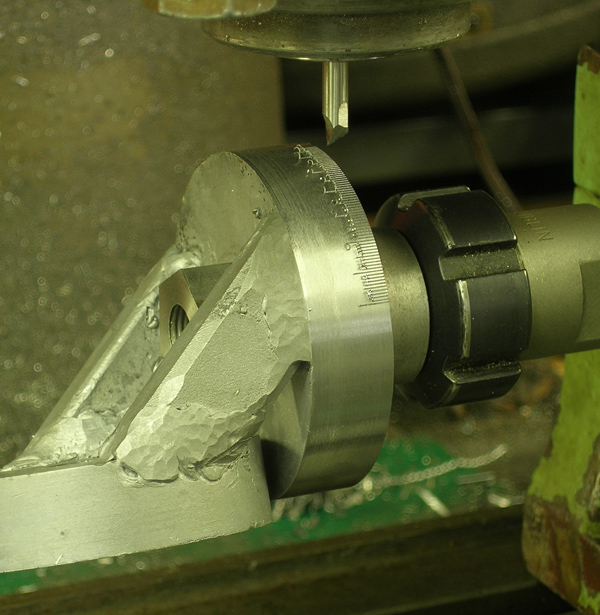
Graduations were done with the work held in a dividing head and a sharp V with some positive rake ground on a round hss blank held in a collet in the mill. The mill has a friction brake, I locked this on (with duct tape, handy mans secret weapon) and cut each line by moving mill table, cut was about 5 thou deep, 5 & tens marks received longer lines. I've not yet stamped the numbers, will probably use the pillar tool with some sort of rig, but haven't thought that out yet.

It's all mild steel except for the obvious brass pieces. A lot of the photos do look like AL, that's because after normalizing the heat treater kindly ran them through his sandblaster.


In an update, Mcgvyer posted the following:

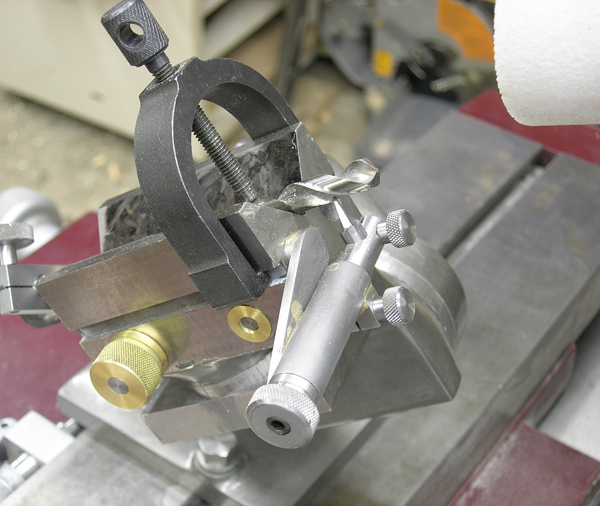
For those of you not sick of my grinding pics, here's a follow up and some shots of it in use

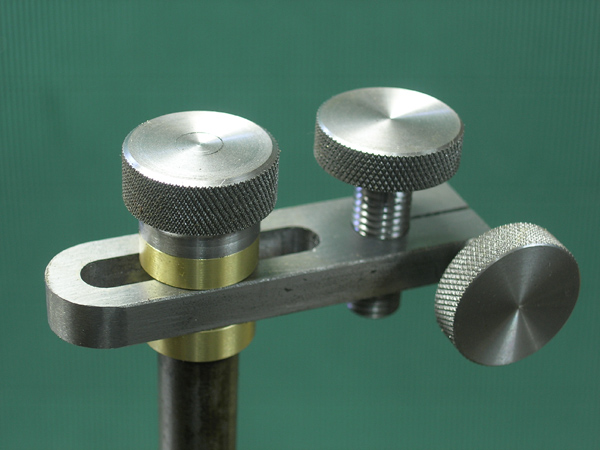
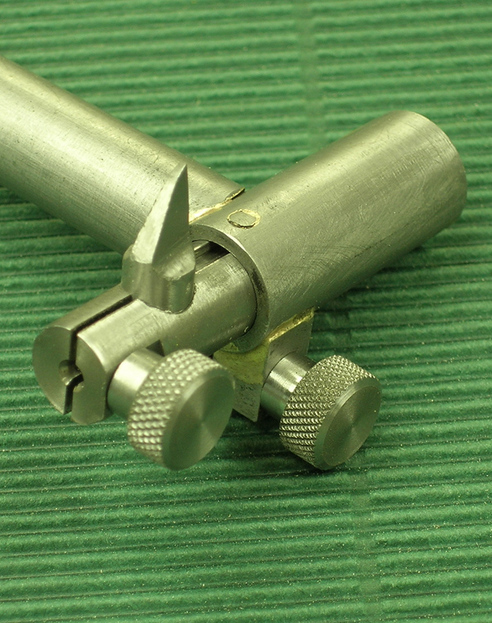
First off, I redesigned the micrometer tooth rest - it needed more of an offset and longer range. Here it is ready to go - 5 separate silver solder joints on this assembly


The V block is case hardened and ground all over, also finished the cotters so both the drill stop and tooth rest is very easy to adjust.


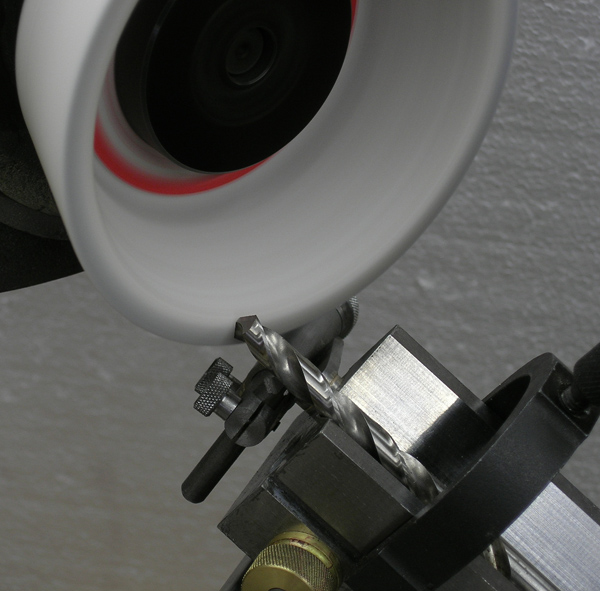
The angles are set on the graduated dials on the universal swivel, I was doing a 118 point with two clearance facets, one at 15 and one at 30 degrees. The drill is placed in the v block and the stop and tooth rest adjusted then tightened down. I generally index the drill and do both cuts on one facet then change the angle of the base to do the second facet or bevel. Over the past couple of week ends I made a mobile stand for bench top T&C - I found it really hard to set up (ie tooth rest) if I couldn't get access all around the machine to view the set up.


Grinding grinding grinding


By making different lengths of rod for the drill stop, the rig can hand almost any size drill


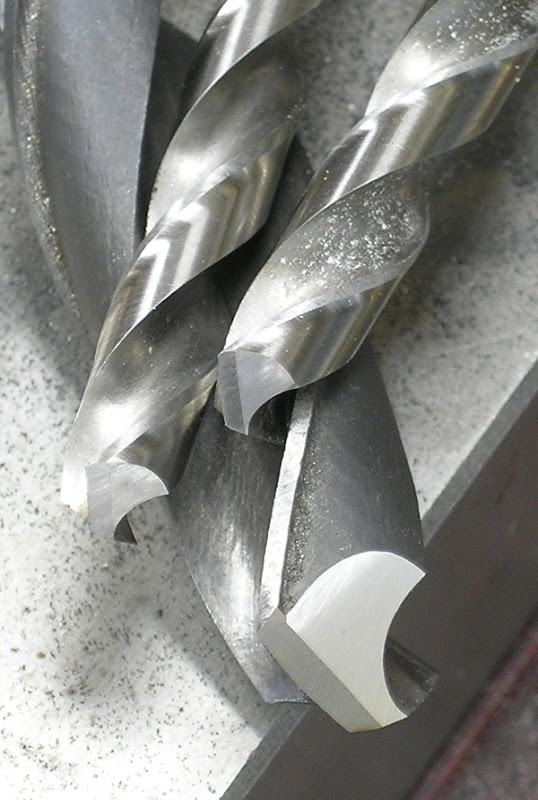
The final result. Yeah, I can sharpen a drill by hand but it will take me a lifetime of Sundays to get so that they are as nice as this. Since they are virtually perfectly symmetrical, the cut very accurately. The one I tried and measured was within a thou, give the limits of small hole gauges.


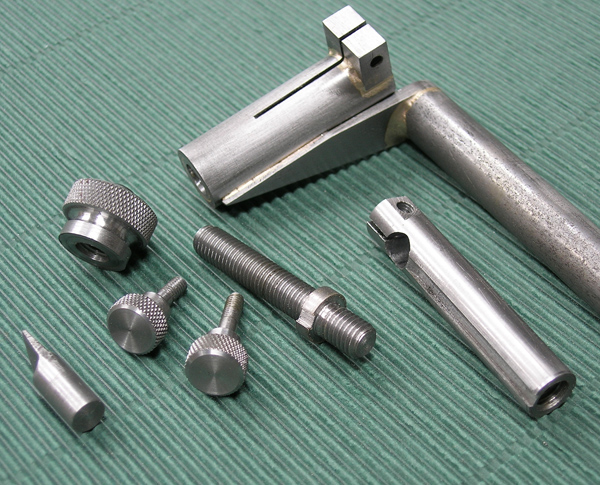
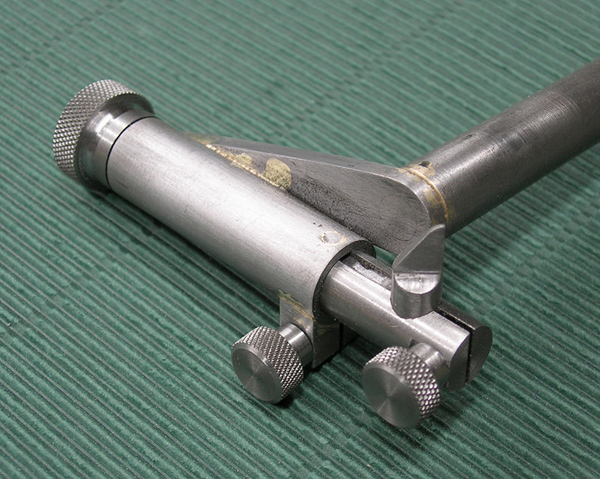
On the Shop Made Tools thread on the Home Shop Machinist forum, mattinker posted some photos of an alternative design that looks like it might be simpler to build. He says: "My tooling for my Clarkson Mk I T&G is slowly getting there, slowly. When I made my Morse 3 tool holder, I discovered split cotters. So I started with three of the following "D" shapes, two of which had split cotters. I fabricated around the "D's", the base plate one is a little bigger. The 20mm diameter CRS round was welded to the first "D" and the face that mates with the second was faced off. A second stub was welded to the second "D" which was faced off to mate with the first using a stub of CRS locked with the split cotter. The third "D" with the second split cotter with the vice mounting plate welded to it. The vise is a 1" screwless from CTC Tools which is big enough for my biggest lathe tools.

Tuesday, May 27, 2008

End Rounding Tool

Over on the HMEM forum, Cedge posted about his end rounding tool:

Paolo requested a drawing of the rounding table I'm using. Since I seldom make drawings to work from, we agreed that maybe photos will help him and others who want to add the tool to their stable. Please note that the photos show the parts and their relationship to each other and the narrative is not written in the order of construction. I'll do this later in the post.

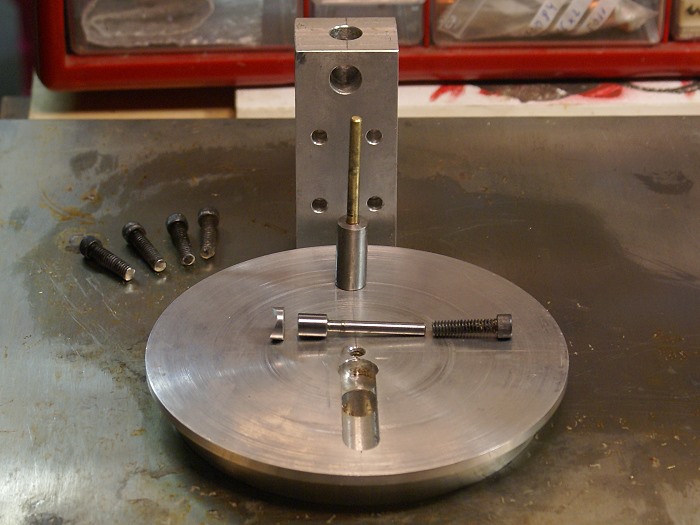
PHOTO #1
Here is the table in full disassembly. The parts are simple and consist of a block to use for mounting as well as to hold the mandrel and associated locking mechanism. The locking mechanism is made from a small piece of 1/2" aluminum with a 1/2" radius cut in the end to allow it to mate fit snugly against the mandrel. The mandrel is 1/2 " aluminum round stock with a 3/16 hole drilled half way through it to accept a 3/16" inch piece of brass. Use a set screw or red Loctite to secure it but be careful that the screw does not interfere with inserting the mandrel in the mounting block. Length on these two pieces is not critical. The top plate is 1/2 x 6 " inch aluminum which came in the round shape from the local scrap yard.

***Note The center pivot rod was made of brass to prevent galling, something soon discovered when it was made of steel.


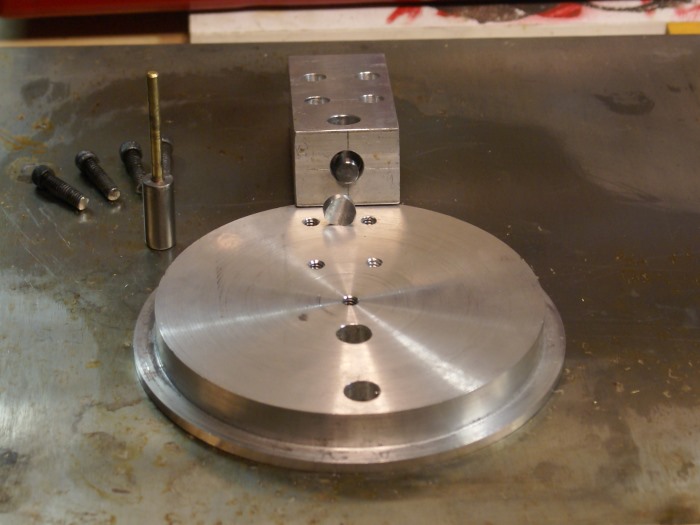
PHOTO #2
This photo shows the opposite end of the mounting block. Note that this hole was drilled through the block from end to end before the larger 1/2" hole was drilled in the other end. The 1/2" hole is only as deep as required to recess the "brake" and the large end of the small rod. The shaft on the small rod is 3/16. The small hole was then threaded deep enough to allow the 1/4 x20 TPI screw to push the brake against the 1/2 mandrel. This acts much like a brake shoe and hold the mandrel in place. It also allows the mandrel and brass pivot to be raised or lowered as needed.

Note that the cutter slot in the top plate does not have to go all the way through the plate. It only needs to be deep enough to allow the tip of the end mill to drop below table level. but I did make it a bit deeper than required, to collect chips. I also drill two 1/2" holes in it to let the swarf escape from the slot. The cutter slot was milled to within 3/16" of the center hole to allow close in work. I might eventually mill it to within 1/8" for even smaller diameter cutting.

***Note... The slot was cut after the mounting block was bolted on. This made for an easy alignment to the table travel.


PHOTO #3
In this picture, you can see the bottom side of the top plate and the ledge machined for the stop clamps to grip. The four bolt holes are tapped to 14 x 20 TPI for rigidity and long term durability.

Look closely and you can see the brake rod has been placed in the end of the block. The small aluminum brake shoe goes in next.


PHOTO #4
Here the brake shoe has been inserted and the mandrel has been set into position within the mounting block..


PHOTO #5
Here is a view of the bottom of the table with the mounting block bolted in place. The screw in the end of the mounting block is used to tighten the brake assembly against the mandrel, after it was adjusted for the desired height of the brass pivot. The mandrel can be easily removed or readjusted by loosening the screw. The table does not have to be disassembled to do this.


PHOTO #6
Here you can see the brass pivot after being adjusted for height as well as the clamps which fit onto the edge of the table. The clamps are made from a scrap piece of 3/4" x1" aluminum square stock. They were drilled and then slit using the popular carbide saw that was the subject of a previous thread or two. You can see this amazing little saw in action on my Water Pressure Engine Thread. By cutting into the drilled hole, very close to the back of the stock, it allows a fairly stiff spring action which lets the clamp flex when the screw is tightened. I chose 10 x 24 TPI screws for these.

You can also see the lines I've scribed into the table top for easy to see position references.

***Note... the bottom half of the clamp's screw hole is tapped while the top is drilled to 3/16" for screw clearance.


PHOTO #7
This final photo shows the table in complete assembly, including the small lock I use on the pivot to hold the work piece down. This lock was made from a drill stop purchased at Harbor Freight. Two sides were machined flat to allow working close to the pivot. The flat next to the cutter slot was also beveled to allow for clearing the 3/8" shank on many small end mills.


Several warnings are in order for those who want to use this tool.

#1... Keep in mind that you are going to be controlling this operation with your hands very near a spinning high speed steel end mill that doesn't care if it eats metal or flesh and bones. One small lapse in attention is all it takes to get into real trouble. Stay focused or leave this tool alone. SAFETY FIRST and double that with this tool.

#2...Use small diameter end mills and light cuts. Larger end mills tend try to snatch the work away and can cause injury.

#3... This tool does not tolerate climbing cuts very well. You can do so on a "return" cut, but studiously avoid it with any fresh advance into the work piece.

#4 ...Avoid using this tool if the work piece does not extend beyond the edge of the table unless you can easily grip it with vice grips or other locking grip tool.

#5... The stop blocks are not there for decoration. They limit the travel of the work piece to prevent it getting away from you. They are great for letting you "hit the mark" but they are there primarily for your safety.

#6... If you are not comfortable with the tool or your setup... don't even think about using it.

#7... Building and using this tool is your personal choice, just as it has been mine. By the very act of making and or using this tool you are agreeing to accept any and all responsibility for your own actions and their results. I will assume no responsibility for any injury or damages incurred from its use whether due to use, misuse, design flaws or any omissions of this material, even if informed of the existence of such conditions.


Ok... now for the order of the build

Square the mounting block in the mill

Drill and ream the mandrel hole to 3/16" at this time.

Drill the 4 mounting holes but do not counter bore or thread yet.

Turn and face both sides of top plate to size on lathe, adding the clamp flange to a depth approximately 5/16" depth.

Center drill the top plate and ream to 3/16" and remove from the lathe.

Insert 3/16 drill rod or dowel pin rod through top late into the mounting block to align and center the two pieces.

Using a transfer punch, mark the four holes in the mounting block onto the back side of the top plate.

Drill the four holes being careful not to drill through the top plate and then tap them according to the size screws you have chosen to use.

Bolt the two pieces together and mount the block in the vise.

Mill the cutting slot and drill the swarf escape holes. I made mine 1/2 wide but a narrower slot is fine.

Remove the bolts and drill and ream the 3/16 hole in the mounting block to 1/2"

Next, drill a hole from end to end of the mounting block. I used a #7 bit to allow for a 1/4 " x 20 TPI socket head cap screw. This also gives clearance for the 3/16" shaft of the brake rod.

Turn the brake rod on the lathe, making one end just under 1/2". Diameter and length are not critical as long as the end will free run in a 1/2" hole. The small end needs to be long enough for the adjusting screw to reach it with a bit of thread still showing. This can be adjusted by cutting the length as needed during fitting. Diameter of the small end is not critical, as long as it is free moving within the long hole you drilled.

The next operation is performed on the mounting block end nearest the 1/2" mandrel hole. Drill and ream the 3/16 hole to 1/2 inch to a depth that will accept the large end of the brake rod plus approximately 3/8".

Place a piece of 1/2" round aluminum in the mill vise, find the center and using a 1/2" end mill, recess one end to accept the mandrel. This can be a fairly shallow cut bu the more surface are the better it will lock the mandrel.

Cut the this milled end to about 5/16" in length and slip it into the end of the block, making sure it recesses just beyond the mandrel's hole.

Drill and ream a 3/16" hole in a 1/2 x 1" " piece of round aluminum.

Press fit, or loctite a piece of 3/16 brass rod into the aluminum mandrel. A set screw can be used but make sure it is fully recessed into the mandrel.

Bolt the table top and the mounting block back together.

Fit the mandrel into its hole and tighten the brake screw to assure it will lock the mandrel in place. Adjust the brake rod length or hole depth as required to give easy operation.

Make a small top locking ring for the brass rod for holding the work piece down.

Make up and fit the clamps and you are ready to use the table.


You will notice I've offered no specific dimensions. This was intentional since the size of vises, mill work spaces and personal preferences will vary widely. I use a screwless vise so the mounting block was extended past the edge of the table to make it easier to secure the table and still reach the bolt on the vise.

The clamps were notched on the bottom side, as shown in photo #6, so they seat firmly against the round table top at two points. This prevents them from rocking when being tightened. Rounding the exposed edges of the clamps will help prevent tool marks on your work piece.

It's a long post and I think I've covered the process from beginning to end, but feel free to ask questions or request clarifications if my rambling gets confusing. Enjoy making and using the tool and be sure to thank Marv Klotz for sharing the original idea. Without his generosity in sharing his ingenious tooling ideas, we'd all still be doing things the hard way.

Friday, April 18, 2008

Polishing

There's a good thread on the HMEM board talking about polishing and finishing models:

I am assuming that you will be final polishing with a buffing wheel. An unstitched linen wheel and very fine buffing compound, plus some vienna lime to finish off.

Nothing looks worse on models that are being displayed as machining marks.
We all get them, some a bit worse than others. The way I look at it is that if it takes me an hour to machine a part, it will most probably take me two hours to get it to a stage for polishing. Remember polishing, because unless you get your metal smooth, polishing it will make it worse.
The only correct way to get your metal prepared is to imagine a ripe soft fruit on the tree, with not a blemish on the skin, if you can get your metal to this stage, it is then ready to polish, not before.
No easy way around this, pure finger aching, skin blistering hard work.
I use a combination of files starting from smooth to almost a plain piece of metal, none of your one swipe to remove 1/2" here. On brass and ali I do a lot of scraping on the faces, an old hacksaw blade with the teeth ground off, then the edge honed on an oilstone to get it totally flat will work wonders when dragged along a rough machined face, square HSS blanks will do the same job, so will your neighbours best wood chisel. Then finish off with finer grades of either wet or dry paper or emery cloth, not held in the fingers, but wrapped around somehing solid. If you use your fingers you will get hollows forming in the edges, not noticeable at this stage, but after polishing will look awful. This is just on the edges, now for flat faces.
You have got to keep flat faces truly flat, with nice sharp edges.
Again the way I do mine is use a hard flat face to work from. You have all seen my tapping fixture that I also use for taking pictures on, well that started life as a small surface plate, so that is my flat surface. Yours could be a very smooth worktop, or like I used to use, a glass plate out of an old photocopier, or go to your local glass merchant and get a piece cut to about 12" square, but ask him to smooth the edges for you.
What you are after for your metal is a perfectly smooth flat surface with very sharp edges.
I use masking tape to stick down sheets of abrasive paper, if wet or dry I put a couple of drops of oil on it to keep the cutting edges sharp. Normally I will start with 400 grade and work my way up to 1200. No backwards and forwards or side to side on this operation, it will introduce a curvature to the flat face. The method used is a lapping technique, whereby you move the job in a figure of eight motion, keeping a steady downwards pressure. After a time you will get into a rhythm and will soon eradicate those annoying marks. Perfection takes time.
You should finish up with a nice, matt, smooth as a babies bum with very sharp edges. Now you can polish it.
The reason you do not polish out machining marks with a buffing wheel is that after you get the marks out, the surface finish will look like a bendy mirror in a sideshow stall, and the corners will look like they had been done with a roundover bit. Not what we are after. If you prepare the metal as I have said, polishing with a wheel will take seconds and the job will look like it has been plated. That was for work with flat or miller cut radii. For round bits done on a lathe, it is usually rather a lot easier because you can get the machine to do the work for you.
If you are smoothing curved bits on the lathe then using loose emery strips or wire wool or scotchbrite, work over gently by hand, being very careful about getting near to the chuck, we are trying to polish, not paint red. For straight areas or large inside curves wrap emery around a flat piece of softwood or round dowel and use it in a filing motion to polish the surface. Again when all machining marks are gone, a few seconds on the buffing wheel will really make it shine.
This was a brief description of how I manage it, other people have different methods, and I hope they will post them here.

Now a quickie from me. I have been building models for many years from wood and plastics and I can get a great paint finish on them, but getting the paint to stick to metal correctly and achieve a showroom finish has so far eluded me. This would make a fine next post.

John


From Cedge.

John
When I first began researching the machinist forums, I often encountered the question, usually asked by a newbie... How do you get a mirror like finish with a final cut?. The answer is always the same... You don't get a mirror finish from a final cut. You have to do it by hand. I do things pretty much as you've described, but my finest wet dry paper is 2500 grit and I've got a few sheets of lapping paper that go as fine as 3 microns. I finish things off with a metal polish called MAAS, which is somewhat like Flitz or SimChrome. It seems to give me a better finish on more types of metal than the other two products.

Flat surfaces get lapped. You can do light touch up with a finger, later, but an nice even flat surface finish requires lapping on a nice flat surface. Here is a another tip that no one thinks to tell you. When lapping or sanding aluminum, use a bit of WD40 on the paper. As you work the piece, a gray paste will begin to form, created by the combination of lubricant and aluminum dust. This paste will begin to load up your sand paper pretty quickly. Many users would exchange this slick sheet for new paper when this happens. However, this is when things are just beginning to get right. Here's why.

Aluminum oxidizes as soon as air hit it. This oxide coating is of the same chemical make up as sapphire or ruby, which are next to diamond in hardness. The best grades of sand paper or emery are made with... Aluminum Oxide(silicon carbide). As the sand paper sheet loads up it is also quickly becoming a very high grade, super fine grit abrasive which is excellent for fine finishing metals. Don't throw the paper away... put it in a plastic bag to keep it dust and swarf free for use, not only on aluminum, but brass, copper, bronze, steel, cast iron, even stainless.

When polishing out tool marks on the lathe, use a sanding block. Its flat surface will prevent those finger induced ripples. The sanding block also gives you something substantial to grip a bit removed from those spinning jaw chucks. I begin with 100 grit to knock off the high ridges and then follow on with 220 grit. then I jump to 400 or 600 before using 1200 and 2500 grits. I also use MAAS, but great care has to be given to keeping the cloth from mating with the spinning chuck jaws. Never warp a finger or hand in the cloth and only hold it so that if it should snag, it will easily escape your hand and you do not follow it into the vortex. Simple rule... rags and chucks don't get along well. Keep trailing ends well out of reach of those snarling jaws. You need to know where all your digits are and where the rag is at all times. One lapse of attention is all trouble need to invade the scene. If you aren't comfortable with this step, don't do it. It is potentially dangerous if done carelessly.

Don't underestimate the value of a Dremel tool and polishing felts. They can make working in a contour or a recess a lot less of a headache. A Dremel felt and MAAS will make short work of difficult access spots. I typically prefer hand polishing, but I'm not going to work harder than is required for good results.

Like John, a good shine is what tells me my engine is truly completed. It only takes a bit more time, but the results are a huge plus, well worth the little additional work it requires.

Steve


Some real good tips there Steve.
I would just like to add that using a buffing wheel or hand polishing is purely a personal choice, they both give the same results. A deep lustre, that when you look onto a flat polished surface it should be like a mirror with little or no distortion.
Now I forgot about his question when I asked about the paint job. Laquering polished parts to retain the shine. But please try to keep any answers to a neutral product range, not all commercially named products are marketted worlwide. I am fed up of stripping down engines to give them a once over.

John


From Gilessim

I've found that the 2 component paint that they use in car body shops now seems to work well even without primer on small bits, the new stuff is also water-based so doesn't stink!, usually the local car body shop will give you a drop in an old can if you ask nicely!, if you put enough paint on ,any blemishes can be "cut out" using fine paper and water as described for polishing metal above, as this type of paint dries very, very hard, though I would leave out the buffing wheel stage on the metal before painting.
Ally ,on the other hand is more tricky, as you should use what is known as "self etching primer" to get it to stick, I don't have any experience with this although I've seen it used and I expect that these days there are new products to prepare the ally first...Giles


From Compound Driver

HI

Ok heres how I brush paint a traction engine. My first requirment from a painted surface is a glass smooth end result with no brush marks runs or dimples.

The first primer coat is always an etch primer brushed and not sprayed. Pheonix precision paints in the UK do a superb single pack etch that goes on really well. This coat is left for a few days to harden fully. I then apply a coat of red oxide primer and let that dry for a few more days.
I next apply a second coat of red oxide and after two days flat that back with 140 grit wet n dry almost to the gray etch primer. The third primer coat then goes on with long even brush strokes side to side on the item being painted. Again two or three days between this coat and the next.

The first colour coat now goes on again full length strokes allowing the paint to flow out from the brush. Once this coat has had seven days to harden fully I rub down with 140 grit to the point that almost all the colour has gone leaving mostly red oxide.

This procedure is carried out a further half dozen times taking less paint away each time. At the end of the six or seventh colour coat the surface will be blemish free and almost good enough to be happy with. At this stage I go to 400 grit and do the same for another five coats. Im still leaving atleast 48 hours between coats for the paint to harden.

Once im happy that there are no surface defects the finish coats are applied and rubbed using 600 or 800 paper. il do as many of these as I need to give the glass like finish. By this time the paint should be going on with out any brush marks.

The very last coat I thin the paint by about 10% and rub before its put on. with 1000 grit or crocus paper. I then leave the part to harden for atleast seven days before the coach lines are painted on.

What paint do I use? well to be honest the cheapest enamel paint I can find. in general it comes from my local decorating shop. Colours are matched by them and it works fine.

My brushes are all sable except for my primer brush and thats nylon. I bought my brushes ten years ago and hope to get another few years out of them before i have to replace them.

An average traction engine tender takes 8 weeks to paint and a weel to line out.

Cheers kevin


From Cedge

Kevin
Good points, all. Something you might try, after the etching coat, is a product called "filler primer". It is formulated to quickly build up in the pits and scratches, making the sanding step a little less arduous. You'll probably find that the number of required coats will drop dramatically before achieving the glass finish you like. It wet sands nicely and makes for a slick finish. Think of it as a primer that wishes it was a body filler.

The one point you expressed that needs to be noted is exercising patience between actions. Most paint screw ups come from not letting the coating cure before properly sanding or other handling. I'm as guilt as anyone about wanting to rush the drying cycle and I have paid for it every time...LOL. A perfect coat of paint requires a lot more than simply grabbing a spray can and going at it.

Having painted with heavy commercial equipment in the past, I'm not afraid of spraying vs brushing. Although I've never been all that good with a brush. Both have to be prepped the right way or your finish is going to be less than stellar.


Steve


From Compound Driver

HI Steve

The filler primer is ok but goes on way too thick leading to a ripple on the finish. Its ok sprayed but that defeats the object of coach finishing.

About twenty coats of paint is the point I aim for. Each coat adds depth to the finished shine. I do sometimes wish there was an easy way to paint the spoked wheels 20 coats on them can dull the senses a bit.

My Durham ended up with 35 coats on the boiler horns and tender took almost a year to do the paint I must be madd.

Cheers kevin


Goodness me lads,
I was expecting, get these two cans, shake it, spray it, job done.
You've got to remember I make an engine a month, no way am I waiting that long to start my next project

Now what about laquer for stopping shiny bits going dull.

John


From Wareagle

Bog, I really think that on shiny aluminum you wouldn't get a real good adhesion to the metal. I think it would start to peel and flake after a period of time. On shiny steel, the results may be a little bit better, but again I see it not having anything to "grab" onto and therefore not lasting long.

Another consideration is the effects that the heat from the engine would generate (assuming there is heat) and the effects of the heat on the finish coat. The finish could dull, change to a semi transparent coating, get a colored tint to it, begin to "let go" of the surface, or a combination of any of these.

One thing that I will add on painting projects is that cleanliness in absolutely important. I wipe all of the items I paint with acetone or rubbing alcohol (make sure the material is compatible before application)before priming and/or painting. I also handle everything with surgical gloves at this stage as well. A simple finger print can cause problems with the finish and can otherwise ruin a nice looking paint job.

As with anything in this hobby, the results are in the details!


For this next bit there are no hard and fast rules, I call it 'skinning'.
When you make an engine from plans, or design your own, usually a lot of unnecessary material is left on the component just because to hold the part for machining necessitates it.
When I have got an engine running to my liking, I then go over each component and remove a lot of the 'spare' material, being careful that I don't cut into any of the mounting holes, thru holes or mating faces. Doing this gives the illusion of a well designed engine and also makes it look a lot more complicated than it really is, rather than a series of square blocks stuck together.
A few basic machine cutters do most of the work I want to do. On the miller a roundover bit, a couple of different sized bullnosed (round tipped) cutters and a 45deg chamfer bit, plus of course standard cutters can get most bits done. On the lathe, a pointed chamfer tool (chamfers both left and right and cuts nice thin grooves using the pointy bit at the end, at a push you can use your threading tool), a profile tool (round nosed tool) and left and right hand facing cutters are usually sufficient.
If you have the 'meat' available, recess the screws and fixings, it makes the engine look a lot more professional. If there are large flat areas, if thickness allows, put say a 15 thou recess into it to follow the contours of the outside edge, then put a bit of colour into the machined recess, this 'lifts' an engine more than anything else. Contrast works wonders, ali and brass side by side look wonderful, black paint and polished metal looks even better.
For the support columns on an engine, just a couple of fine grooves equally spaced at the top and bottom looks like you have taken the time to make it look different. Learn a new technique for doing something, I did on my mine engine with the columns, love them or hate them, you have to admit they do make the engine look different. Drilling a conrod with equally spaced but reducing in size holes gives the illusion of a tapering, super lightweight, machined for performance, after market accessory.
The sky is the limit on something like this, look around you, there are designer bits everywhere, if you see something you like in full size, try to replicate it onto your engine, I have just looked away from my monitor and seen maybe ten things in a few seconds that could be incorporated onto an engine surface that will lift it above the norm, grooves, curves, angles, all make something look 'finished', and with a little practise will allow you to make your 'own' engine.
There is in all honesty nothing difficult in what I do to my engines to make them look different, other than, time, patience, practice, and a few bits in the recycle bin that didn't turn out as expected, but hey, I am only human (contrary to what some people think).
Thursday, March 13, 2008

Simple tools to build

There are a lot of simple tools that I'd like to have in the workshop. Here's a list so that someday I might actually get around to making them.

Lead and brass hammers (for seating work into the vise, etc)

Wednesday, March 5, 2008

Small shops

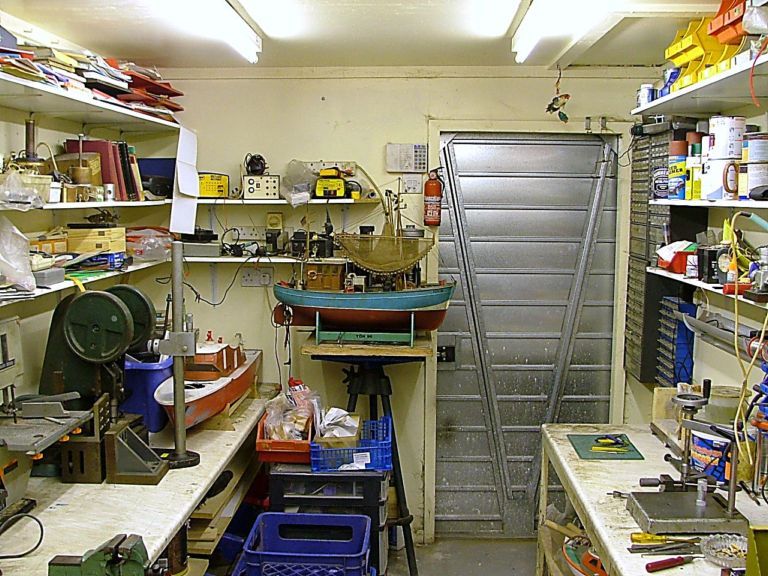
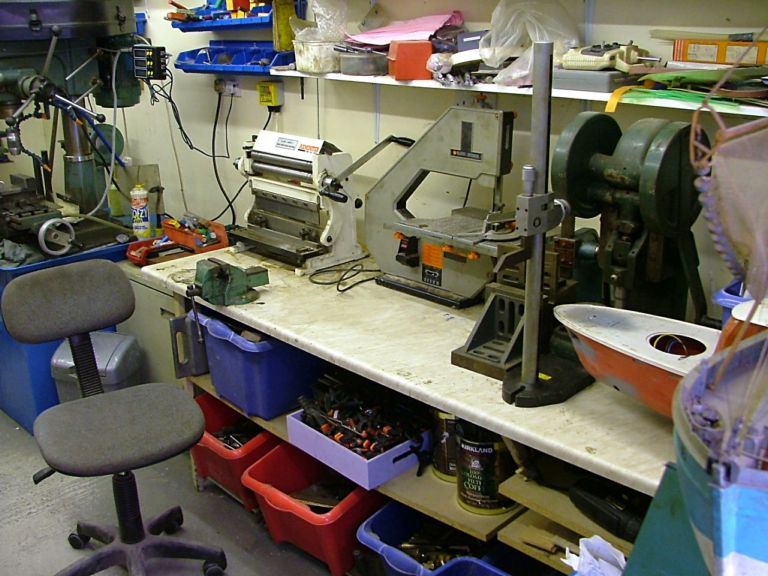
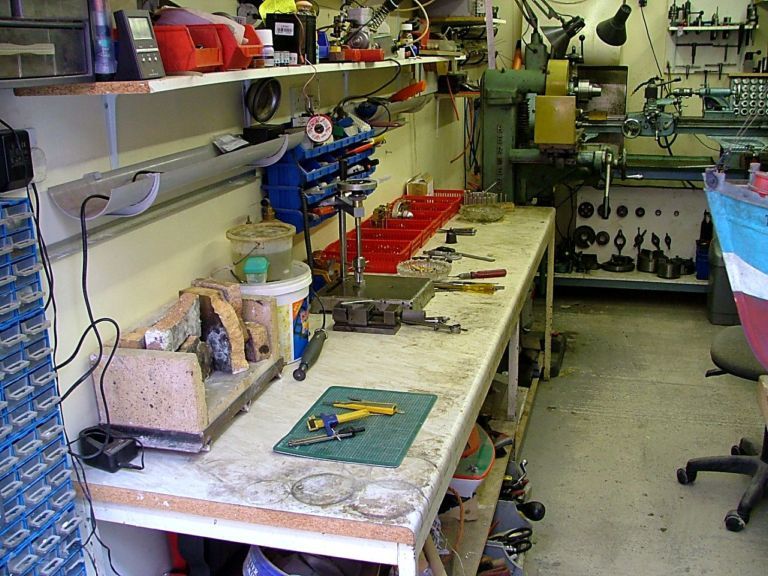
I love small shops. Particularly the ones that are in a building by themselves. Most of these seem to be owned by British model engineers. Seems like most Americans find room in a basement. There's something comforting about having just the amount of space you need.

Bogstandard posted the following about his shop on the HMEM board:

Here is a little insight into how I do things. First off I built a prefabricated sectional concrete workshop, 16ft x 9ft internal measurement after first laying a 6" thick concrete base, then fully lined the inside and ceiling with 2" insulation board faced with plaster. This keeps me warm in the winter with just a small fan heater.
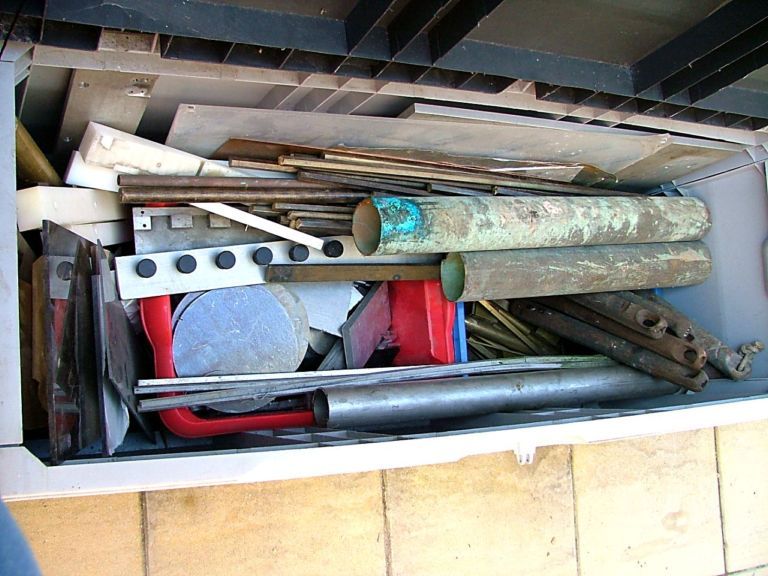
This first pic shows my outside stash, all obtained from either the recycling yard or friends donations, the copper tubes on top are about 4" diameter, plus my sash weights which supply most of my cast iron.


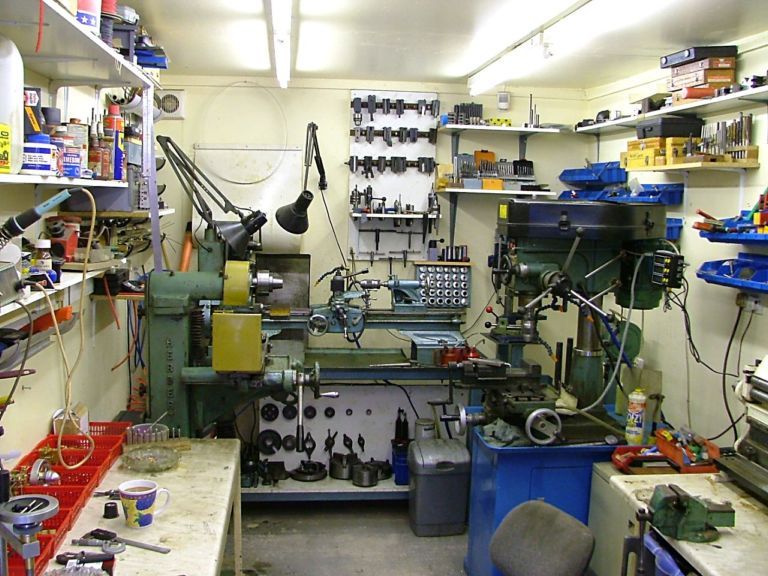
This next shot is coming in from the door, notice not a lot of room. the machinery consists of, on the left a 1960's Herbert surface grinder, in the middle an Atlas 10F 42" bed lathe and on the right a standard type mill drill with a cheap 3 axis DRO fitted. I have to go sideways thru the gap and usually end up with watering eyes because the handles reach parts other handles don't.


This one shows the shop from the machinery end with the metal prep area on the left and build area on the right.


Bit of a closer view of the metal prep area plus my inside stash on the bottom shelves.


Build area consists of a small brazing/heat treatment area plus a marking out area. Next along is another marking area with my tapping stand followed by the engine build area.


This last shot is my workhorse, The Atlas 10F lathe, nearly 70 years old, but I have brought it right up to date by fitting a Timken roller bearing head, Myford resettable dials, quick change toolpost plus loads of other small modifications. This lathe is now super accurate, especially since I fitted a 5c collet chuck.


About the green press with the flywheels, he says:

It is called a toggle press.
It is hand operated but the 'flywheels' help to make for a very strong punching press. With a correctly angled punch, 3/16" brass sheet is punched straight thru. I use it mainly for blanking out brass and copper discs and pressure assembly of parts.
Not many about nowadays, but if you can get hold of any old stuff, snap their hands off.


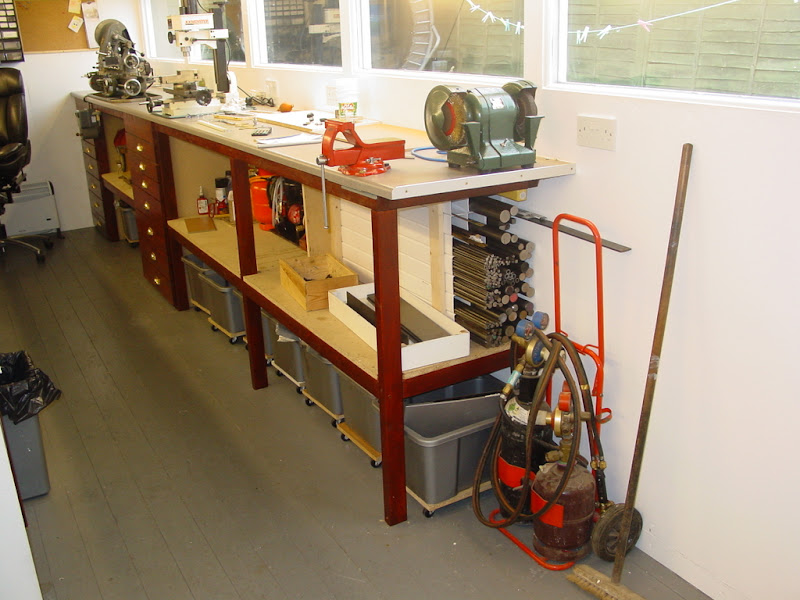
firebird posted about his on HMEM. Here's one photo:


There's two things I particularly like about this. First is his long stock storage under the bench. The other is the containers he has on casters under the bench. Very effective use of space.