Friday, August 13, 2010

Draw bar hammer

hornluv posted this draw bar hammer on the HSM forum. I thought it looked like a neat thing to make:

Here is a draw bar hammer I made. I used a 3/4" deep socket as the base of it. I machined a square on the brass insert and pressed it into the square on the socket. I then made a steel insert to take up all the empty space in the middle of the socket so I would have something to tap into. Drilled and tapped to 1/2-20 (The socket was hard-ish, but softer than I expected). Turned and knurled an Aluminum handle to fit and voila! Now I can loosen and tap in one fell swoop. Soon the world will be mine, mwahahaha!

Thursday, August 5, 2010

Digital Microscope

On the Home Shop Machinist forum, Evan posted a nifty microscope he made from a camera lens and a webcam:

Yep, Macro Scope, using ordinary camera lenses in macro mode. I have been taking micrographs by snapping pictures with a digital camera held to the eyepiece of my stereo microscope but isn't easy to achieve good focus and contrast. I decided to build something more suited to the job and easier to use.

It uses a generic 1.3 megapixel web cam. Various camera parts were used as well as a variety of raw materials. The base is flycut recycled HDPE that looks like black granite, the main column is a solid bar of extra hard mystery stainless steel that was .030 out of round to start. Gave a bit of pucker factor when I needed to drill and tap two 4-40 holes in it. The rack and pinon are machined from brass as are the supports for the twin lens adjustment rails. The elevating housing is made from acetal bar stock and the lens height/fine focuser screw is aluminum. It took a week of on/off time to make.


It can be dissassembled into 4 main components without tools in a few seconds. Different lenses may be attached via M 42 pentax screw mount or adapters. Long lenses (telephoto) work best because they give more distance to the subject for a given magnification and back focus distance.


Some sample images:

1: The edge of a broad radiused HSS cutter that I thought looked pretty good. That's why I built this device.

2: The point of a carbide graver that I hand sharpened on a diamond wheel. This is one of my best gravers for brass and it's because the flats are very symmetical.

3: An insert that looks ok to the eye but suddenly started cutting poorly.

4: The same type insert new. Note that the edge isn't very sharp.


To Do list includes an X-Y stage, measuring software overlays and an inserted illuminated back light in the base.


Evan later posted about a modification he made to it, replacing the webcam with an NTSC camera, and mounting a cheap LCD display on it.

I think that one of the inexpensive import granite comparator stands that Enco usually has on sale would work really well to base this on, if the size was right. You'd already have a solid base, and nice column, and fine adjustment mechanism. I think you could probably do a lot of things that you might use an optical comparator for with one of these, at least for simple HSM stuff. It would be easy to overlay a drawing of a gear tooth cutter on an image from this, and see how it compares.

Tuesday, August 11, 2009

Crossdrilling block for lathe

black85vette posted on the HMEM board about his build of a crossdrilling block for the lathe:

Saw it in this post:

http://www.homemodelenginemachinist.com/index.php?topic=5361.msg57395#msg57395

Thought it was such a cool but simple tool that I just had to have one. So here is mine. Used some 2" square aluminum stock and then faced it on the lathe on 3 sides (left the other 3 alone). Mounted it on the compound in place of the tool post and made a groove in it with a 90 degree drill mill. Nice thing is that it is centered on the spindle without any effort. Then drilled 4 holes to use to clamp the round stock in the jig. I went with bolts rather than studs so I can work closer to the collet. So there it is; dirt simple but very useful.

Full credit to Foozer for the great idea.


In one of the posts, the following YouTube video was posted:

Tuesday, February 10, 2009

Frank Ford posted on the Home Shop Machinist forum about his simple radius dresser:

Coincidentally, I just this week made a radius dresser for my tiny Sanford surface grinder. I just used materials I had on hand, and didn't make drawings. I'm at work now, but I'll post a photo or two here when I get home tonight.

Update, tonight -

Here it is "in situ," on the mag chuck:


I had this welded angle with a big hex nut stuck on, and I used it as the basic support. Just another item from the salvage bin. I bored the nut and angle to 1.125" to insert a couple of standard ball bearings that could accommodate a half inch shaft.


The "arm" of the dresser started out as a piece of heavy hot-rolled angle.


I turned and knurled the entire shaft from a piece of 1.5" 12L14 steel I had in the bin, and made a little flat spot to be able to lock it in place at exactly vertical so I could use the rig as a standard flat dresser as well as swinging it for radius forms. I did the graduations mostly because I could, and I can always use the practice, dontcha know.


Once I was finished, I spent some time with a height gauge and measured the center height accurately. As you can see, I wasn't so concerned with neatness as when I stamped the graduations on the knob. Oh, well, I never really expected to photograph this one. . .

Monday, November 3, 2008

Shop supplies

Just a list of things that I've seen that I think would be handy to have in the shop.

Cam action drill press vise
squirt bottle for lubricant for hole drilling
table covers that fit around the vise on the mill and keep swarf out of the t-slot

Thursday, October 30, 2008

Transfer screws

I've seen transfer screw made from bolts and such, but I came across a reference to Heimann transfer screws and I think they're neat.

The transfer screws have a small hex at the base of the point.


The screws nest together inside the wrench/holder. Note that there must be a hole in the back of the transfer screws for the point of the one behind it to slide into it. The end of the wrench has a hex broached into to it. The top cap screws off.


The size of the transfer screws is stamped into the wrench/holder.


I'm not sure if this last one is shopmade or not. But, it almost looks like the end is a socket head cap screw. Would probably be easier to attach one of those to the end for the hex socket than to broach the hex in the end of the holder.

Friday, October 24, 2008

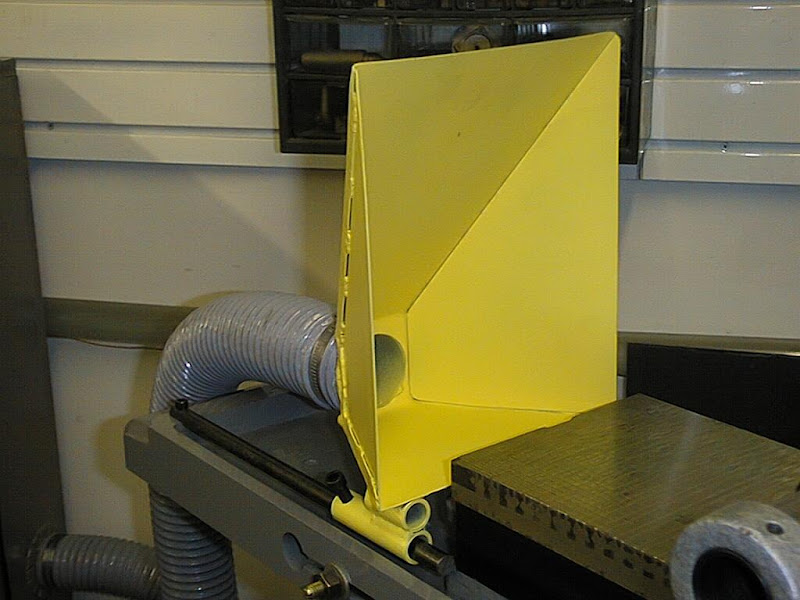
Dust collector

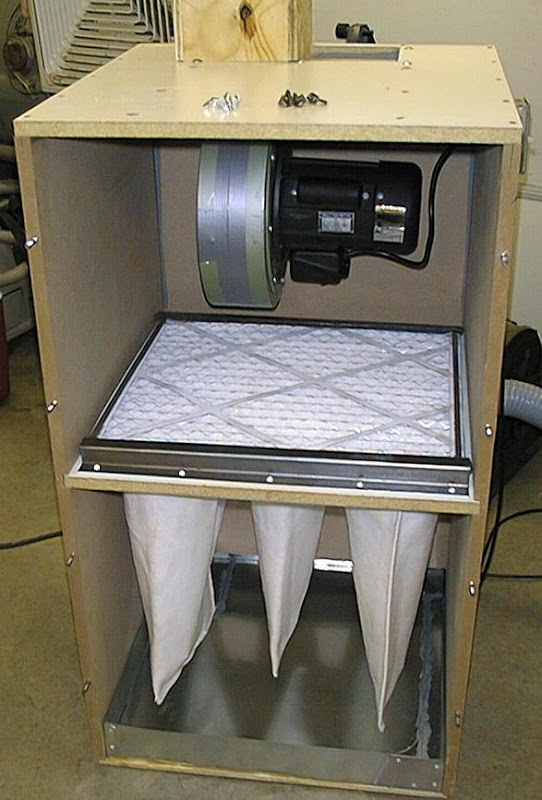
My surface grinder makes a lot of dust. If I want it to coexist nicely with the rest of my machines, a dust collector is a must. Holescreek posted some photos and a description of his on Practical Machinist:

Several members of this board (myself included) have posed questions as to what everyone else uses for grinding dust control in their home shop. I read the few threads in the archives on both boards and ended up with more questions than answers. Most of the web sites I googled cater to wood dust.

In my little home shop I have one surface grinder, a couple of snag grinders, and a small belt sander that I use only for metal. The surface grinder was my primary concern so I based all of my requirements for dust collection on it. I watched industrial Torit type units on Ebay for several months hoping that I could snag one close enough to home to pick up myself and save freight. Not having a forklift to unload a semi is one drawback, then having to either buy yet another VFD or change a motor out was another.

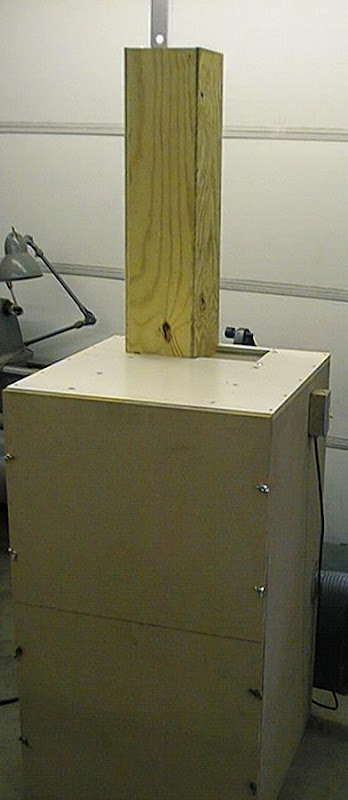
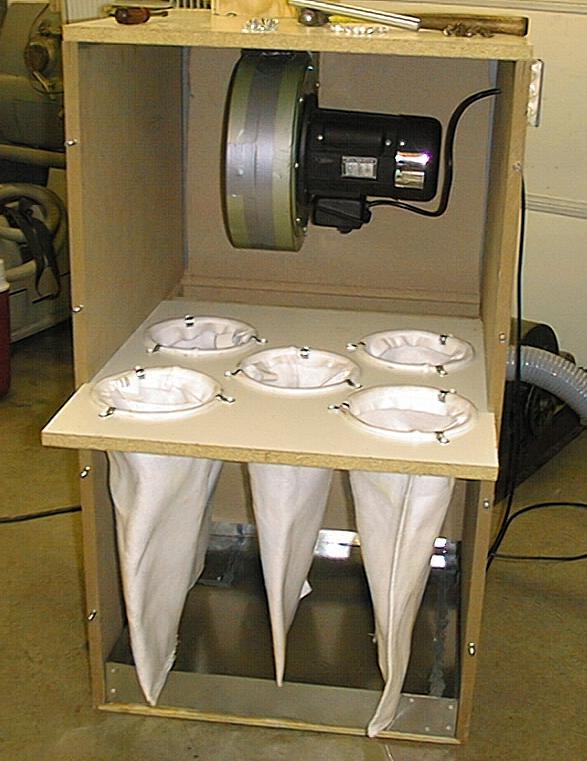
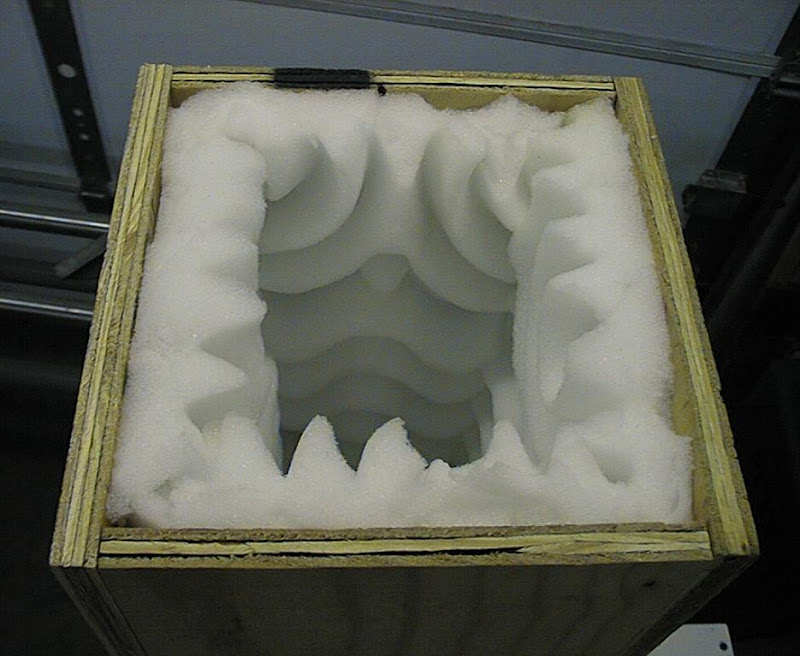
I refined my list of requirements to fit my wants: single phase, fine filtration, mobile, quiet, safe (from fires) and CHEAP. My wants pretty much decimated the majority of dust collectors available on the net. A friend gave me an old furnace blower so I started prototyping a dust collector around it. I figured that I'd just start trying stuff. I pulled the covers off of a Torit #64 at work to see what they did. To make a long story short, the furnace fan wasn't feasible (but it was quiet) without using a 10" duct. I was about ready to give up when I found a damaged 650CFM HF dust collector on Ebay for $30. I wasn't going to use the broken part anyway, and it was about an hour drive each way to get it. The noise that it made measured out at 95dB sitting on the floor. Putting it in the box I had left from my furnace blower attempt dropped it to 85dB and adding the insulated exhaust stack took it down to a manageable 75dB. Since this is a prototype I figure that I'll remake it out of steel on a smaller scale to fit the HF impeller later on. I used MDF for the current case. I know it can burn, but I often use MDF for impromptu welding jigs and seldom do I ever get a flame from stick welding directly against it. I've got around $50 in everything so far, and the suction is very strong. The 5 filter bags were picked up at a local flea market. I found them in the McMaster catalog as polyester filter bags rated at 25 gallons/min. I think the catalog had the mesh size at around 2-3 micron. I held a piece of filter over a butane flame and it melted but would not catch fire. I added the close weave furnace filter on top for good measure, and the whole tray slides out for maintenance. I’m sure there’s a few things I can come up with to improve on it, from what I’ve read, I could use a lot more surface area on the filter bags. I’m open to suggestions from the group.


Matt Isserstedt had the following to add:

Wondering if a large 90 degree square "elbow" on the exhaust stack would further reduce the noise level.

The egg-crate/waffle foam is a wonderful idea, however noise that radiates "straight up" can still escape...if there were another foam surface directly above that might absorb some more. Might be able to accomplish the same thing with a "cone hat" type of cap lined with the foam and then exhaust air escapes 360 degrees around. Thinking somewhat like the drip cap on a fireplace's chimney.