Thursday, February 28, 2008

Sensitive drill press

For drilling smaller holes, a sensitive drill press is handy.
Jerry Howell has plans for a Mini drill press

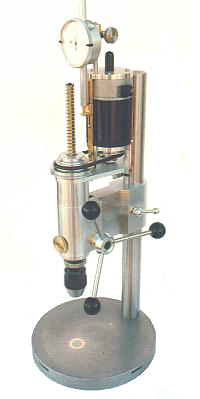
and a Micro drill press
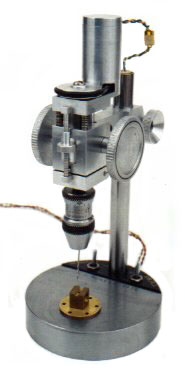
Some YouTube videos of a mini drill press:
Video 1
Video 2
Video 3
There's also a sensitive drilling table in Projects 1 by Village Press:
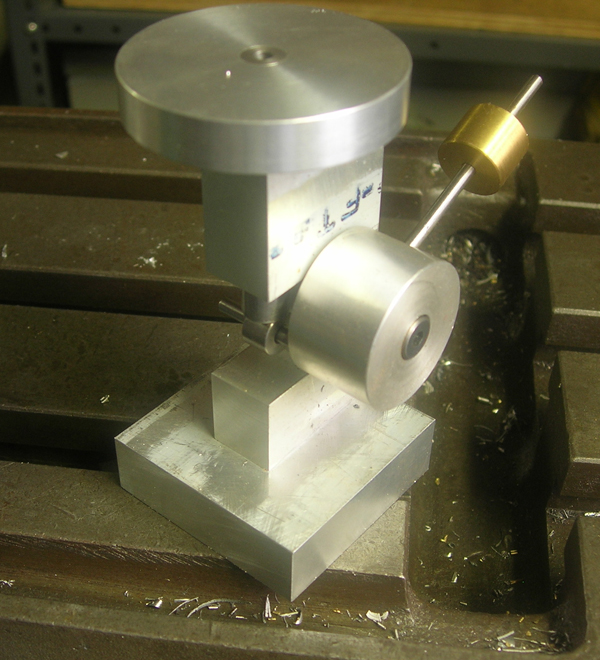

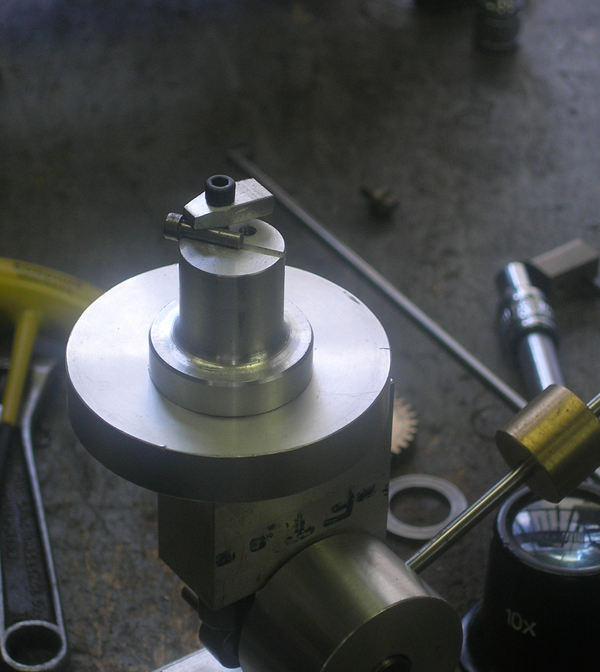
And then there's George Thomas' Universal Pillar Tool.
Building links here and here.
The following ME articles are the ones I could find regarding the UPT:
Vol Issue Page # Title Subject
140 3501 1104 1 Tapping machine and staking tool - General arrangement
140 3502 1165 2 Tapping machine and staking tool - Arms & spindles
140 3503 1209 3 Tapping machine and staking tool - Staking tool
141 3510 351 4 Tapping machine and staking tool - Further details
142 3548 1078 5 Tapping machine and staking tool - More details
142 3549 1149 6 Tapping machine and staking tool - More details
146 3647 1504 1 Mini Drill for Tapping and Staking Tool - Introduction
147 3648 12 2 Mini Drill for Tapping and Staking Tool - Main arrangement
147 3649 86 3 Mini Drill for Tapping and Staking Tool - Sleeves
147 3650 143 4 Mini Drill for Tapping and Staking Tool - Feed lever
147 3651 218 5 Mini Drill for Tapping and Staking Tool - Handle
147 3652 295 6 Mini Drill for Tapping and Staking Tool - Conclusion


Mcgyver posted about his UPT on the HSM and the HMEM forums:
hadn't posted many pics lately, so a few weeks ago i snapped up a bunch of my UPTI experimented a bit with the photos – its just a black piece of cardboard with the shop lights off and sunlight through a window. Camera is a P&S Nikon P3 (I affectionately call it my POS P&S). It does have the advantage over other P&S that you can control aperture. Everything is done with a tripod and no flash. I also put my name on each pic, what the heck, I made ‘em
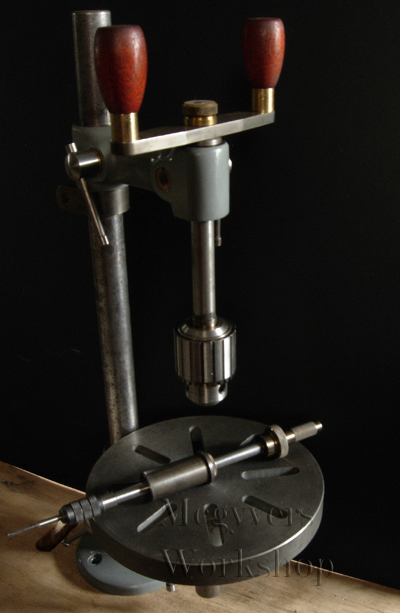
The project is the Universal Pillar Tool, a classic designed by George Thomas. I went full bore and made all the accessories including the sensitive drill head.
Here’s a smaller tapping head. For the newer guys, not breaking taps depends on keeping them straight so this tool is very handy. I used the end off an Eclipse pin vice of some sort, but still had to make a collet to fit common small tap dia. The bushing in the arm has a small spring underneath the threaded brass cap that presses light on the rod – very handy as the tapping head stays where you leave it and doesn’t fall into the work.

Here’s a close of the small tapping head handle showing the “D” coupling. This is my design and gives and positive drive without having to tighten anything. It’s a snug fit, won’t fall off accidentally.
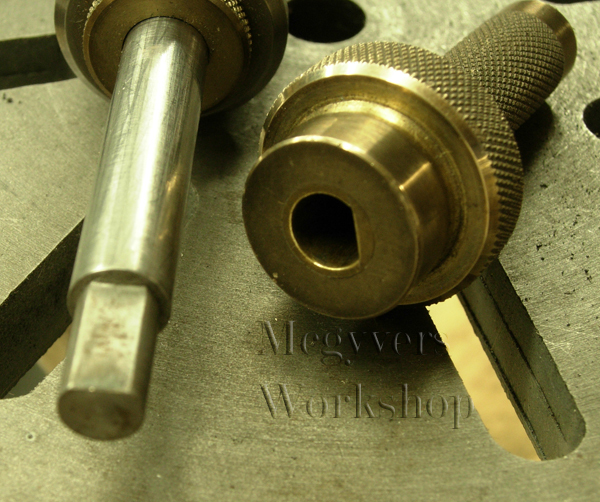
Here’s a larger tapping head
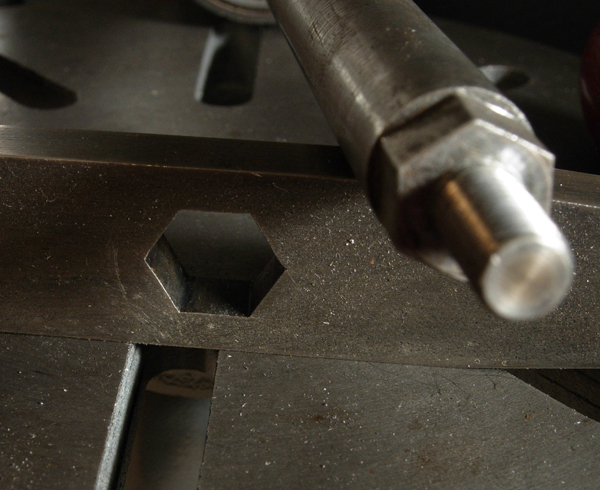
It’s handle is held on by a hex I laid out and hand filed. I’d heard filing hex’s that fit perfectly in each position was the sort thing they’d assign apprentices to teach them to file so thought it would be a good test. It fits amazingly well, the secret is to use a bit of blue as you’re getting close and be very specific about where you are removing material
Reconfigured a bit, the tool becomes a staking/riveting tool. Here a couple of blank tools are shown.
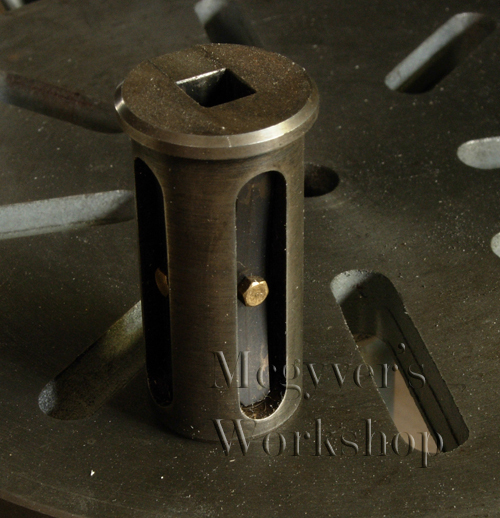
Similarly, a square bushing holds number/letter stamps

The bushing for the square punches is interesting – there are two springs with detent balls underneath to hold the punches in place – a very nice feature!
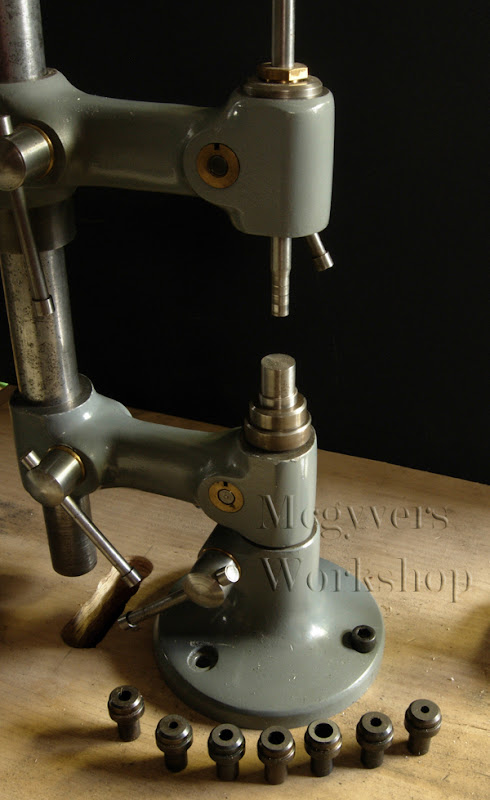
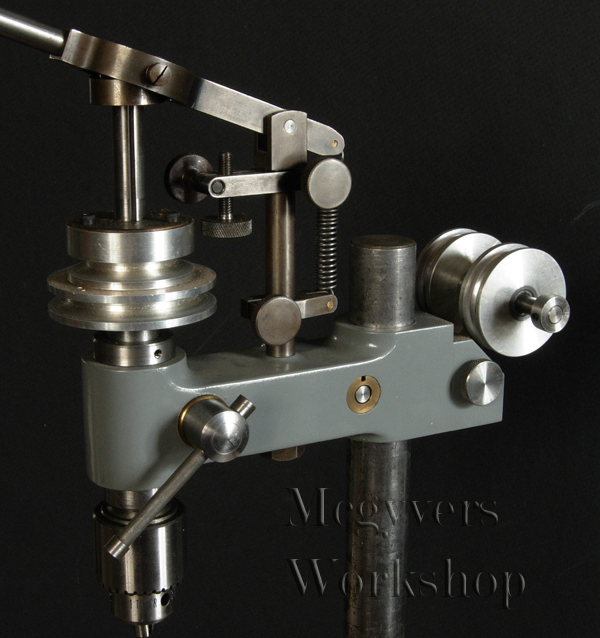
The most complex accessory is the drill head. It works very well and is a pleasure to use. There is an extra casting for this kit but they wanted a fortune for it so I carved my own.
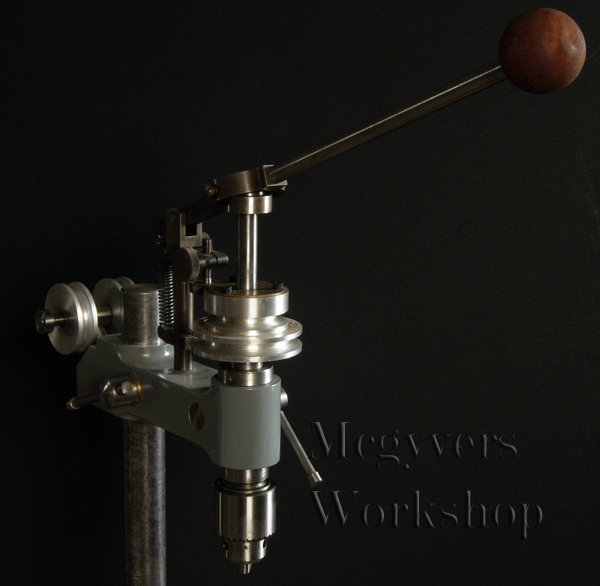
Here’s a close up.
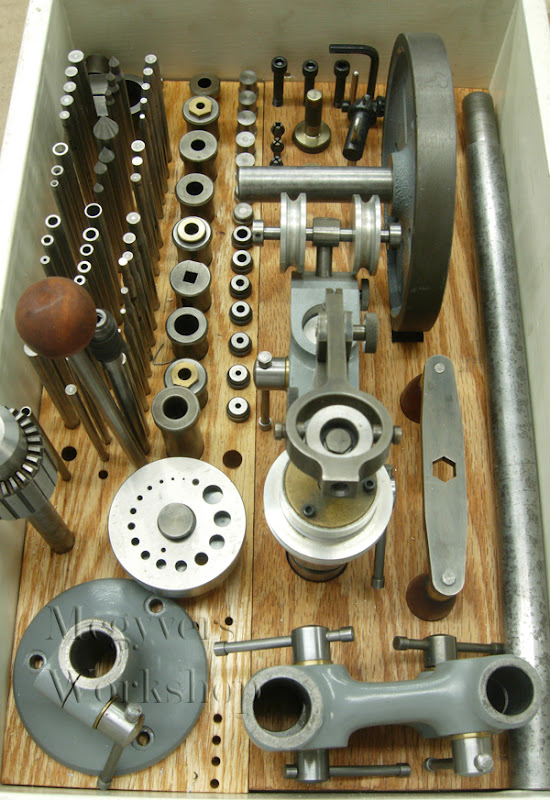
Lot’s of accessories to make. This photo’s a little dark, I still need more exposure experimentation I guess. Most of the staking/punching tools are made but not yet hardened.

It resides in an old drawer with a lid. Hey at least it keeps the condensation off. One day a better made box will get done
Hope that was of interest


Castings were bought eons ago, maybe Power Model Supply when they were around? can't remember. They are still available I believe, check with model engineering suppliers. While cast iron is nice, you could make the whole thing from bar stock like i did the drill head.
Andy, here how i made the D shape. take a piece of brass, say 3/8 dia. Boring the bottom 1/2" to the D's ID radius, milling a section a away, soldering on a flat piece. now, back to the lathe, and turn the OD to neatly drop into a bore in the brass handle and solder (or loctite). if you look at the pics you can see the the lines that shows these fabrication. Hard to explain the drill mechanism with a reasonable amount of typing and my camera is currently busted. I'll take some detailed pics when i can. basically there's a gimbal with a bearing at the top with a radial groove in it. two pins in the gimbal fit into this groove (you can see them in the last pic),
Norm, I have that book, always thought it was basically a reprint of Thomas's two other books? anyway, I like it. Also, years ago HSM did a excellent build article that appears in one of the project books. There'd be minimal welding if you didn't make from castings, for example the arms could be machined from say 1.5 x 1.5 steel stock. Our be luxurious and get some Durabar.
The other note i'd make is I went with peened over tommy bars throughout. This is a departure from the traditional ball handle which is more difficult to make and by many's standards the 'right' way to do it. imo the tommy bars are superior as the can be operate from two positions and there are lots of pinch point set ups where this is a real advantage, the traditional charm of ball handles not withstanding.


LizardKing posted the following:
For all the Americans interested in one of these, I bought a full set of castings from http://www.martinmodel.com/ a few months ago.
Quality if really good and he does have more at around $100 plus shipping for a set which includes 2 arms, table, base, and drill head.


Mcgyver posted again about his UPT on HSM showing it's use for stamping metal: you're right, how many otherwise great looking tools look amateur hour with crooked stamping. A friend who apprenticed at GM recalls a 2 week stint in the stamping shop....no one came out of there not being able to stamp straight. How do you get to Carnegie hall? practice practice practice not wanting to spend two weeks practicing, there's Geo Thomas's UPT which has a great component to it, a square holed holder with detent balls and springs so the punches don't drop out. Clamp a fence to the table and by hand slide the work along for perfectly aligned stampings. Any two pieces of metal together can form the corner....figure out how to hold the corner above table with fence and away you go. Here's some pics of a recent project just for fun - using the UPT clamped to the mill table to mark graduated dials
aligning things


punching
results...things more or less straight!

Tubing bender and unbender

Mcgyver posted on the HSM forum a tubing bender and unbender he made:

I made this a few years, ago but used it today and have never taken photos of it so thought you guys might like to see it.

occasionally when making models, one has to bend copper tubing. the typical tube bender, while successful in creating a bend, is not up to the task for modeling as 1) it won't work to a small enough radius and/or 2) distorts the shape of tubing around the curve - ie not a smooth transition from curve to straight on both the inside and outside curves. Thus began a bunch of experiments and reading on to produce a decent bend in a tube.

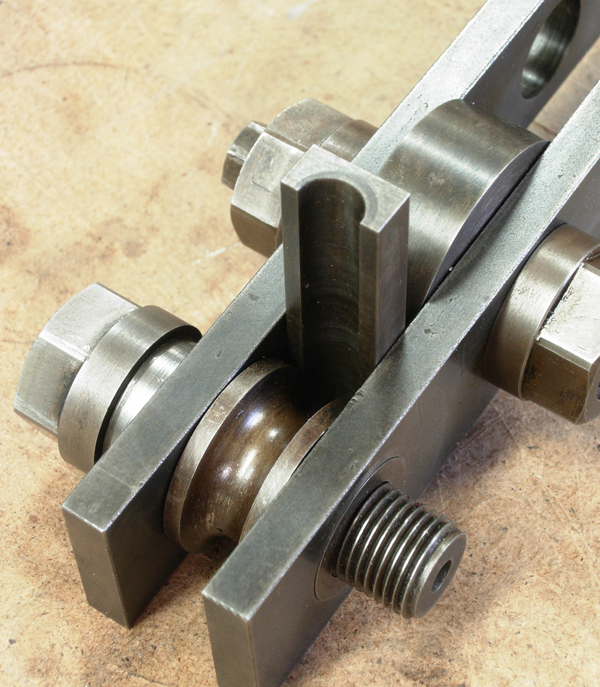
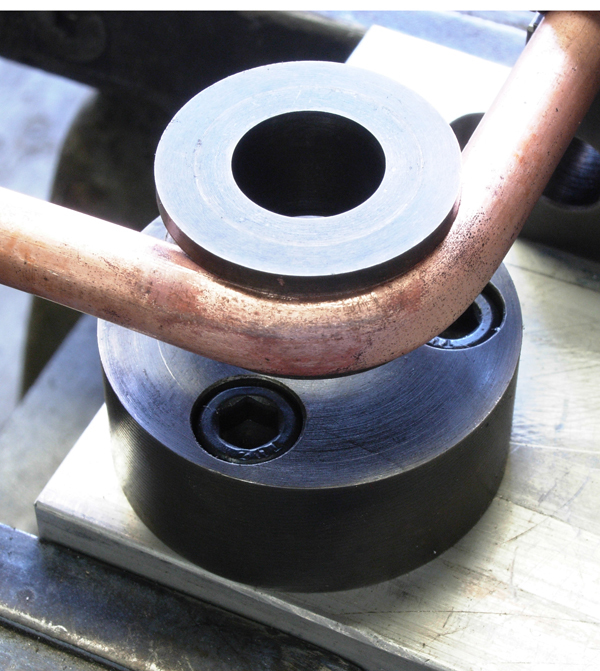
What I came up with has two unique (well they were to me anyway) features. 1) the outside die, rather than being a round die like the inner is straight. 2) the outside, straight, die, gets tightly pressed against the inner die, sandwiching the copper tube between them. This done via an eccentric axle. If you look in the pic, you’ll see the straight die, then a cylindrical spacer. It's this cylindrical spacer that is on an eccentric shaft.


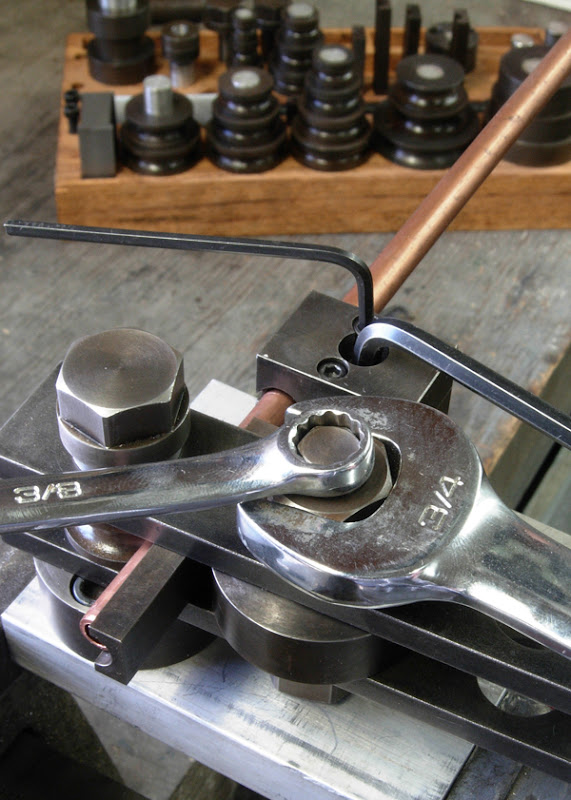
Here a bend is being set up. The tube clamp shows a larger allen key setting the orientation of the clamp along a tee slot, while the smaller one clamps the tube itself. I made slit spacers for different sized tubing. In the main pivt, about the round die, there are spacers such that it is firmly bolted to the base, yet free rotate.


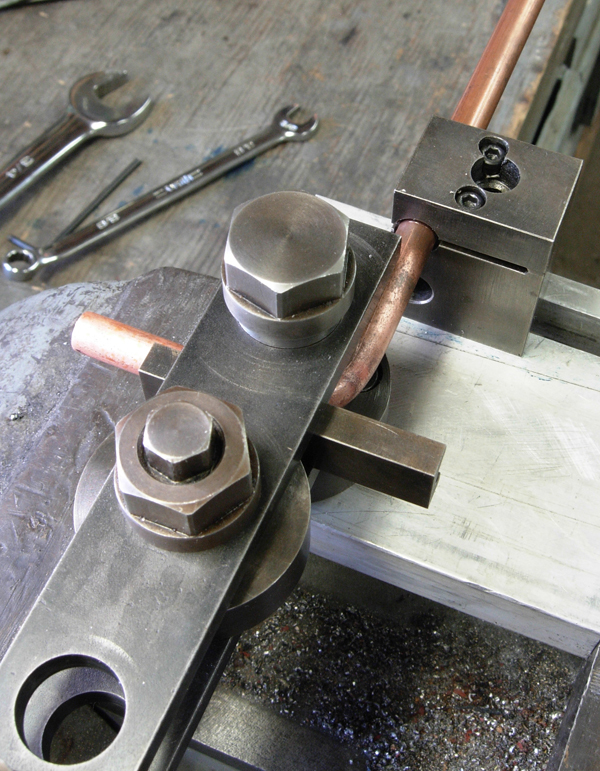
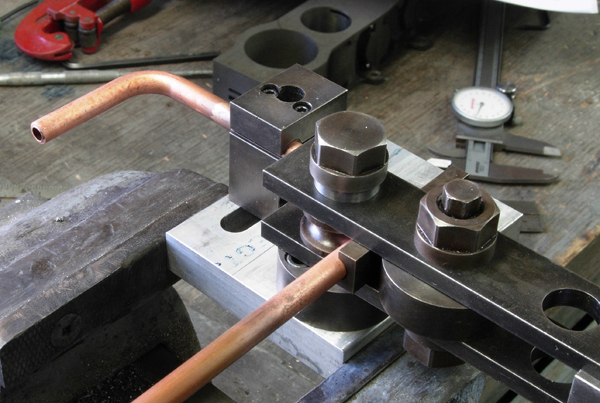
here's a shot after completing the first and second bends. the tube was annealed for these bends


here's a close up showing the fairly decent shape that is maintained. ideally the bend looks like 1/4 of a torus without kinks or ploughed-up leading edge to the bend.


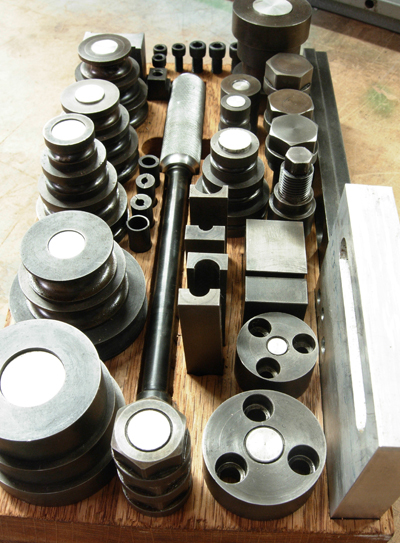
of course, if you're going to make a tube bender, you're going to do so for all sizes of tubes and radii. Should I ever commit a heinous crime, I consider this important work towards my insanity defense. It handles tubing from 1/8 to 3/8 by 16th’s


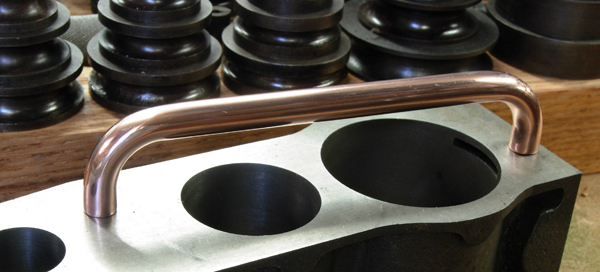
after cutting to length and some emery and polish work, here's the finished product. It’s sitting on the block to which it will one day be attached. Imo it turned our well, its a .5" centre radius bend in a 5/16 tubing. Still, the Stuart plans (this is for a triple expansion) calls for a 5/16 centre line bend, the accomplishment of which still eludes me, even with this rig. perhaps filling with cerro or something.


nothing is hardened, figured its low duty cycle and bending copper. I will probably use casenit on some parts, ie the top 3/8 hex on the pivot is starting to get dinged up. The finish is just the wipe on blue done to help fight rust.

here's the device i used to cut the radii. hardened a bit of drill rod with a clearance taper to it and then after hardening, surface ground it down to be the right dia. it work reasonably well, had I known about the 'up and over' style using a boring head and tangential cutter, might have gone that route


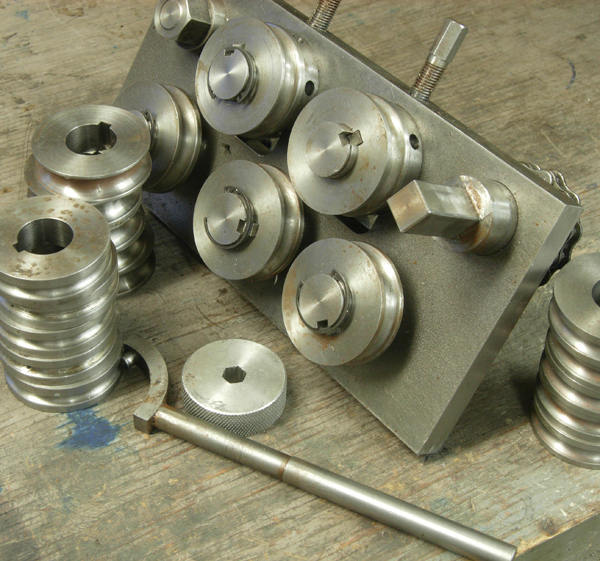
the tube comes in coils which isn't much good for my purposes. you can straighten it by tieing one end off to a tree and the other to a bumper, but that reduces the dia and is a pita in my urban environment (I'm sure the neighbors already think I'm certifiable, let alone if they keep seeing me out tying crap to a tree and to my car).

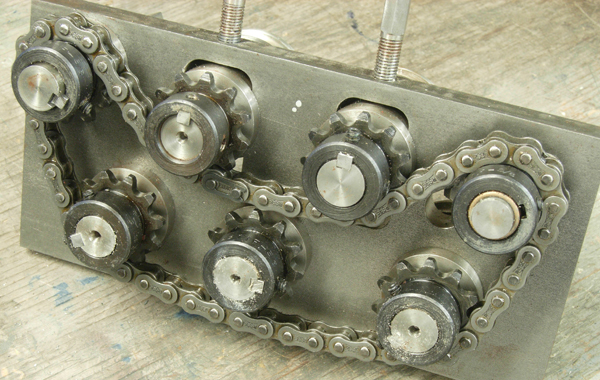
so i made this mill. the two upper rollers are adjustable. orginally they locked into position via a threaded collar and spanner (shown in the pic) however this wasn't positive enough so i added the hex screws to keep them in place. the middle roller, while it has a sprocket, pretty much idles. it works well and is powered used the table crank from my mill.

here's a few shots of it


Lathe carriage stops

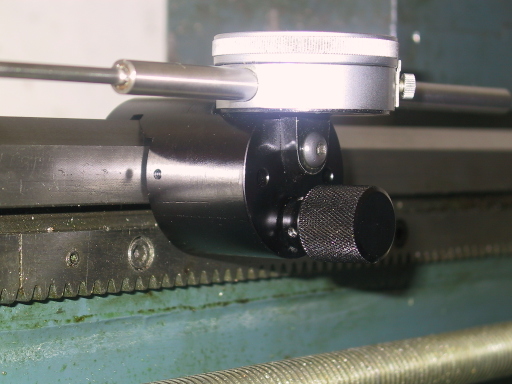
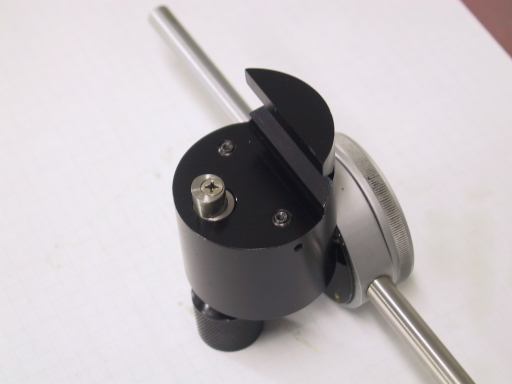
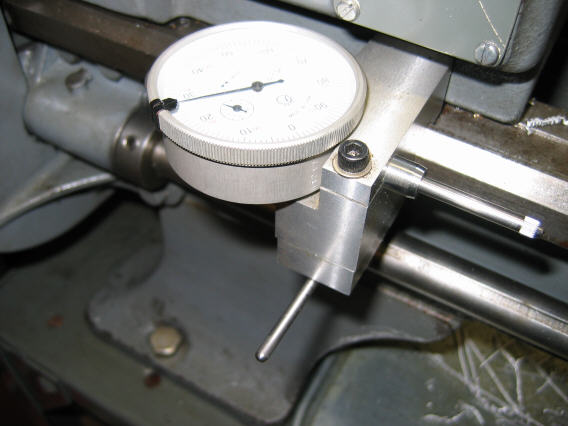
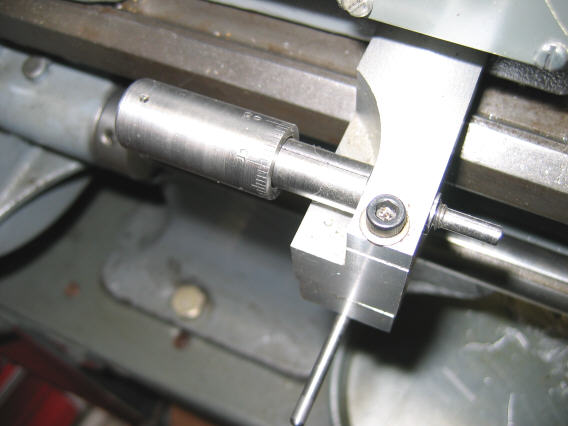
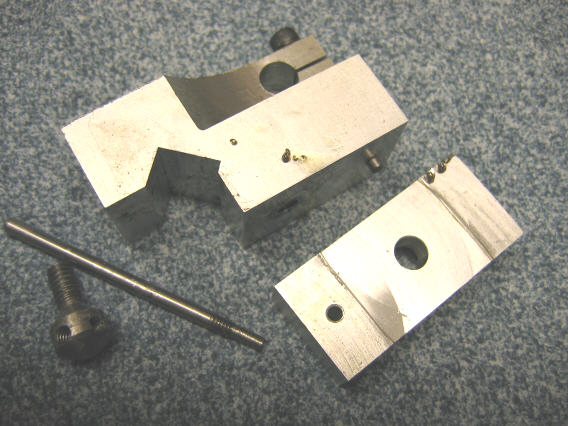
A few ideas for lathe carriage stops/indicator holders:

Daryl Bane posted this one:


It clamps using a retractable eccentric pin. A quick twist of the knob will lock it and if you pull the knob the whole thing can be lifted away.

J Tiers posted this:


One poster suggested cannibalizing a HF micrometer to use for the depth stop.

Copper Laps

In a post on the HSM board, McGyver said:

Here's some I've made and have used on various engines. in each case i held the casting in the lathe, covered the bed with paper towels. the laps float and hand held - you get a very sensitive feel on what parts of bore are tight. work your way up in grits expanding the lap every so slightly as you go. copper is the right material to use, the grit gets embedded in it. to save $$$ i solder thin copper onto a steel barrel.


There was also a link posted to an short article he wrote about these:
http://metalworking.com/dropbox/_2002_retired_files/copper_laps.pdf

Note: This article seems to have been deleted from the dropbox.


On the HMEM board, Swede posted his technique for using laps:
Obviously your experience with honing has served you well. I tried a number of brake hones, and for me at least, it was a disaster. I know that there are some quality honing tools out there, such as Sunnen, which might help a new guy. As for lapping, the technique is to find a lap that is preferably longer than the bore, but that is not critical. The cylinder is bored in the lathe as best you can, leaving behind perhaps 0.001" to 0.002" for the final lapping. If your bore has no taper and a fine finish, you can get away with perhaps 0.0008", a little less than a thousadth. If the bore tapers, then you have to plan for the lap to eventually open up the bore to the widest part of the cylinder, plus another 0.0005" or so.

You then purchase or make a brass or copper lap like the ones in the picture, and if necessary turn it down with the expansion plug set at zero so you can get a fit of -0.001" or -0.0005", give or take. You need room for the compound.

The lap is charged. To charge a lap, mount it in a drill press, and select your paste. I start with Clover 320 grit, call it "medium" grit. If you have a lot of metal to remove, go to a coarser grit. Dab a bit of the paste onto the lap, and turn the drill on slow. Take a small steel flat, preferably hardened, and use it to distribute the paste all over the lap. Once you have an even coat, you use the steel flat to press, HARD, and this forces the grit INTO the lap metal. Then, remove most of the compound from the lap. When done, the lap has a frosty appearance and a rough feel, with dabs of compound resident in the grooves or holes of the lap's surface.

With Kerosene as a lube, or WD-40, the cylinder is installed onto the lap, and the lap expansion screw is tightened. The drill press is OFF, of course. Tighten the lap until you get a slight to modest resistance when you turn the cylinder relative to the lap. You should be able to turn the cylinder by hand.

Release the cylinder. Turn the drill press on its slowest speed. I will now describe a process which can be injurious if care is not taken. Be sure there are no sharp edges. This is the only case where I recommend a leather glove be worn when using a drill press, but ONLY if there is NOTHING that can possibly snag the glove. A "big boy" approach is definitely taken. To begin, you simply grasp the cylinder so that it stops revolving. There will be drag. Pump the cylinder up and down the lap, keeping a bit of the lap exposed on both ends. Within seconds, maybe 30 to 45, the resistance will fade; it will be easier to keep the cylinder stationary relative to the lap. Stop the lap when this reduction of resistance ends. The lap has cut as much as it will with that expansion set.

Take a look in the cylinder. You will see a frosted gray area, and area(s) that are "as bored" in the lathe. The frosted areas are the newly-lapped portions of the bore. Track the process with a good internal mike.

You then expand the lap a little, dab more compound onto it (thin it with kerosene or wd40) and reinstall the cylinder, this time flip the cylinder end for end. Repeat the process. Keep it liberally wetted with kerosene. It will make a bit of a mess. Each time you examine the cylinder, more and more it will be lapped vs. the original lathe turned bore. If the bore is slightly tapered, you can focus on the tight spots by dropping the cylinder's wide portions BELOW the lap, but keep it moving. The entire process by its very nature tends to create a true cylindrical bore. You have to WORK at it if you want to make a tapered bore.

At the end of the process, you can install a finisher lap with a finer grit, but really this often is not necessary, as you want the slightly coarser finish for an IC engine cylinder, as opposed to a hydraulic piston bore, which sometimes is a mirror!

I hope this helps someone... it seems a bit like voodoo, but it is surprisingly easy to do. For an IC engine, I recommend that you finish your cylinder, including lapping, before turning the piston(s) and making the rings, as you will base those measurements off of the bore's. And realize too it is no big deal if you go oversized a bit. An engine that is supposed to have a bore of 0.875" will run just fine if you end up at 0.879", so long as the rings and piston are turned to adjust for this larger bore.

Here's a small photo of the type of laps he uses:


Bogstandard posted on the HMEM forum:

You can in fact use almost any material for the lap as long as it is softer than the part you are lapping. For steel, I use brass, for brass I use ali, for ali I would use a nylon rod.
You should make the lap a nice sliding fit into the bore, and ensure it is parallel along its length.
If starting off with a grinding paste, dab a bit of paste onto the lap, and roll it on a hard surface and use a piece of hardwood to embed the cutting agent into the lap. What you are doing is making a very accurate round file. For soft cylinder materials like brass or ali, on no account use one of the diamond lapping compounds, it embeds itself into the cylinder wall and will act like a file on your piston.
If possible make the lap a bit longer than the cylinder and always try to have the whole length of the cylinder on the lap at all times, this will tend to lessen the bell mouth effect.
Grinding paste will break down during use and go into smaller particles. You go from fine to finer compounds until you have a perfectly smooth bore. Normally you would then lap the piston to the bore, but in your case where you are using graphite, this can not be done, so the bore has to be smooth in its own right, then make the piston to fit.

The way I do it works for me, someone else might have different methods.
For your leaded steel I would start with fine automotive grinding paste (used for grinding in valves), at small pot will last you the rest of your life.
The lapping action is, have the lap in the lathe chuck running at a very slow speed, and feed the cylinder on to it, get ready to let go quick, just in case it 'bites' and starts to turn with the lap. It doesn't take long to lap a part, usually only a few minutes. The hand action is (and no dirty thoughts here) while moving the cylinder up and down the lap, use a bit of wrist action to give a twist to the up and down action.
Then when the first charge has stopped cutting and gone to a sludge, have a look at the bore. It should look a dull finish all the way along with slight herringbone scratch marks from the lapping. If there are any machining marks still in there, they will have to be removed by further lapping with the grinding paste. Just recharge the lap and repeat. It will be the machining marks that will cause damage to your very soft piston. You just keep repeating until ALL machining marks are gone.
In your situation where you won't have a metal piston to lap fit, what I would do is turn up another lap to fit the just finished rough lapped bore. Then using something like metal polish or t-cut, pop a bit onto the lap and repeat the lapping process. You can go finer and finer with the polishes, it just depends what you want the finished bore to be like.
What you do is make the piston to fit the bore, for graphite you can polish it down with newspaper wrapped on a bit of flat wood to polish the outside of the piston and bring it down in minute steps, but make sure you keep everything square.
If done really well, the piston should slide really smoothly thru the bore, but when you put your finger on the end of the bore, the piston should stay where it is in the cylinder, held by the vacuum caused by the piston trying to drop. That is of course if you haven't already put a mounting hole thru the piston. In that case a bit of sticky tape over the hole will allow you to carry out the check.

Monday, February 25, 2008

Optical Comparators

I've always thought an Optical Comparator would be a neat thing to have.

ME has a two article series on building one by Richard Butterick, 'Optical Comparator for the Workshop'. Volume 183, Issues 4107 and 4109, pages 628 and 736, respectively.

Toolboxes

At some point I need to get some better tool storage for my workshop. I'm currently using two mechanics toolboxes. They work okay, but I waste some space because I need to either leave room to open the tops, or not put anything in the tops.


Stu Miller posted this about his toolboxes:

About a year ago, I started two wooden machinist's toolboxes of my own design. They are now finished. Each is 12 by 18 by 10 inches deep


The lighter box is of oak with maple drawer fronts. The other is mahogany. The cases are joined with box joints with the backs rabbited in for strength. Drawer joints are an interlocking version I came up with that could be cut on my table saw. Drawer sides, backs, and guides are of maple salvaged from pallets. The drawer guide system duplicates my Gerstner box, including the bullet catches to prevent the drawers being pulled out too far. Drawer bottoms are sheet metal and are lined with butyl rubber/cork as per Paula's very brilliant suggestion on the Gerstner improvement thread.

The drawer pulls were made on my circa 1900 Pratt & Whitney No. 1 hand screw machine. Actually making the handles took about an hour. Setting up to make them took about a week. Probably not time efficient, but it was more fun than making them on my SB 9.


John Stevenson, on the HSM board, posted here and here about these:


I have made most of my own boxes with nothing more than a bench saw. I'm not the best woodworker either. Some while ago I bought a big load of oak Parkay flooring. At least that's what it's called in the UK. It's those wooden strip about 2" x 6" x 3/8" thick you lay in floors in a herringbone pattern.
These were being sold off.
I cut some 3/8" ply for the sides and back, just kept the good stuff for the fronts.
I sawed a groove in all the pieces just up from the bottom edge to hold the bottom which is fitted during assembly. The front and backs had a rebate at both sides to allow the sides to fit in and have a bigger glue joint. I engraved the fronts before assembly and glued and clamped these in a simple angle iron box frame and used wedges to clamp the pieces in.
The sides are just ply with a small strip of oak glue on to match the fronts.
I know there are faults with these but so what, I made them, I use them and I'm proud of them.
I have lined the bottom's, some with green felt soaked in inhibitor oil and some with foam carpet underlay when I ran out of felt {g}


Not quite as 'fine' as the ones above, but probably more practical for a workshop environment.

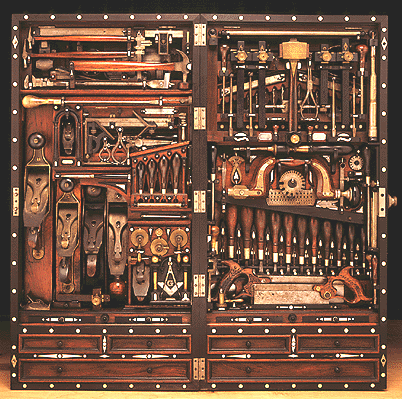
You could stack several of these if you needed to, and you wouldn't waste the space above. I could probably make some out of maple or oak, which would look nicer, but MDF is cheaper and faster to work with. But, it seems like if you're going to go through all that work to make it, and it's something you'll have for a long time, maybe it's worth the extra time to make it look good. Maybe I'll build one like H.O. Studley did:


:)


On the HSM board, Bill Pace posted his idea for using a broken band saw blade to hold up drawings and such. What caught my eye was the toolbox on his bench, which looks to be shop built (_not_ meant as a disparaging comment). This looks like it would be about ideal for my bench.


Woodcraft sells this plan that looks like it would be a nice box.


There's an article and plans about a nice toolbox in the Shopsmith Hands-On magazine here.

Friday, February 22, 2008

Depth gauges

Marv Klotz made several different depth gauges:

If one makes small parts, one needs a lot of specialty depth gauges - at least I seem to:


The one in the foreground (after a design by Elmer Verburg) is especially handy.
By moving the lock screw well away from the measuring plate, it's easy to lock in a measurement when the measuring plate is deep down in some inaccessible cavity of a part.

However, I've developed another variation of this that works well in more conventional designs. On my gauges, the rod is secured by a pin which passes through the gauge body and captures the rod. This pin is threaded on one end to accept the knurled lock screw. On the other end I form a button a bit larger than the rod. Before drilling the hole for the rod, I assemble the rod into the body with a couple of washers holding the button proud of the body. The lock screw holds this assembly together as I drill the rod hole.


After drilling the rod hole, the washers are removed. Now, when working in cramped quarters, merely pressing on the button will lock in the measurement until the gauge can be withdrawn and the knurled lock screw tightened.